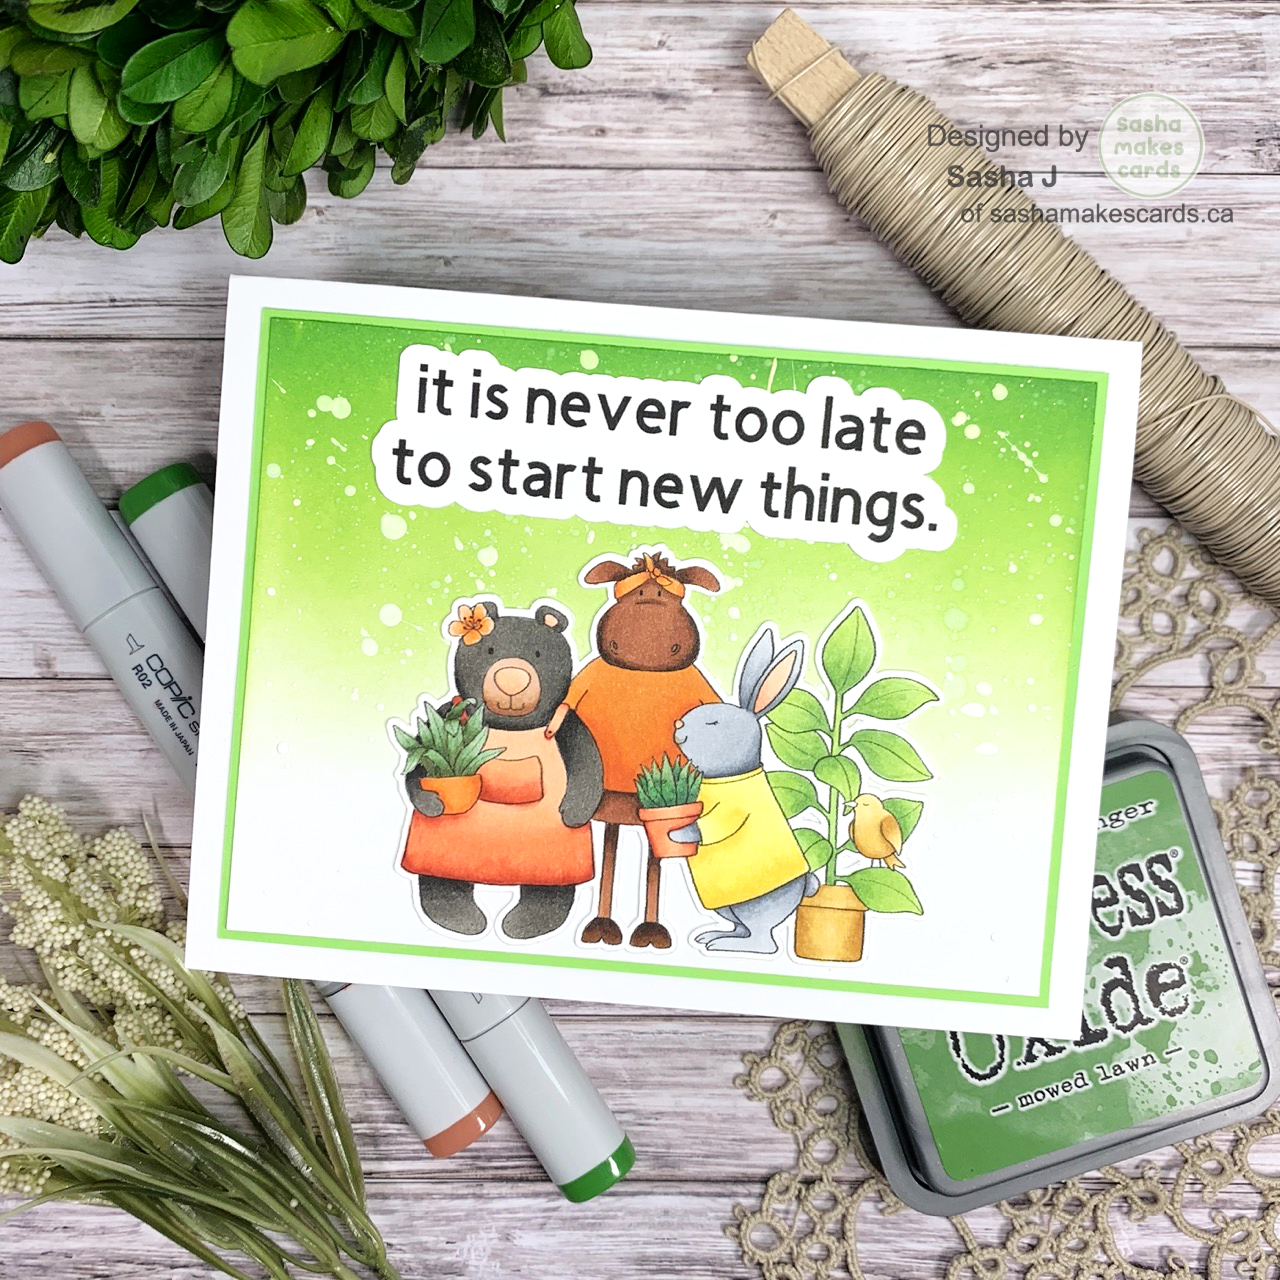
Hello friends! Today, I am taking part in an amazing hop over on Instagram called the Proud to be Proud of Me hop, where we allow ourselves the opportunity to celebrate ourselves! There are 21 amazing prizes to be won from some great sponsors!

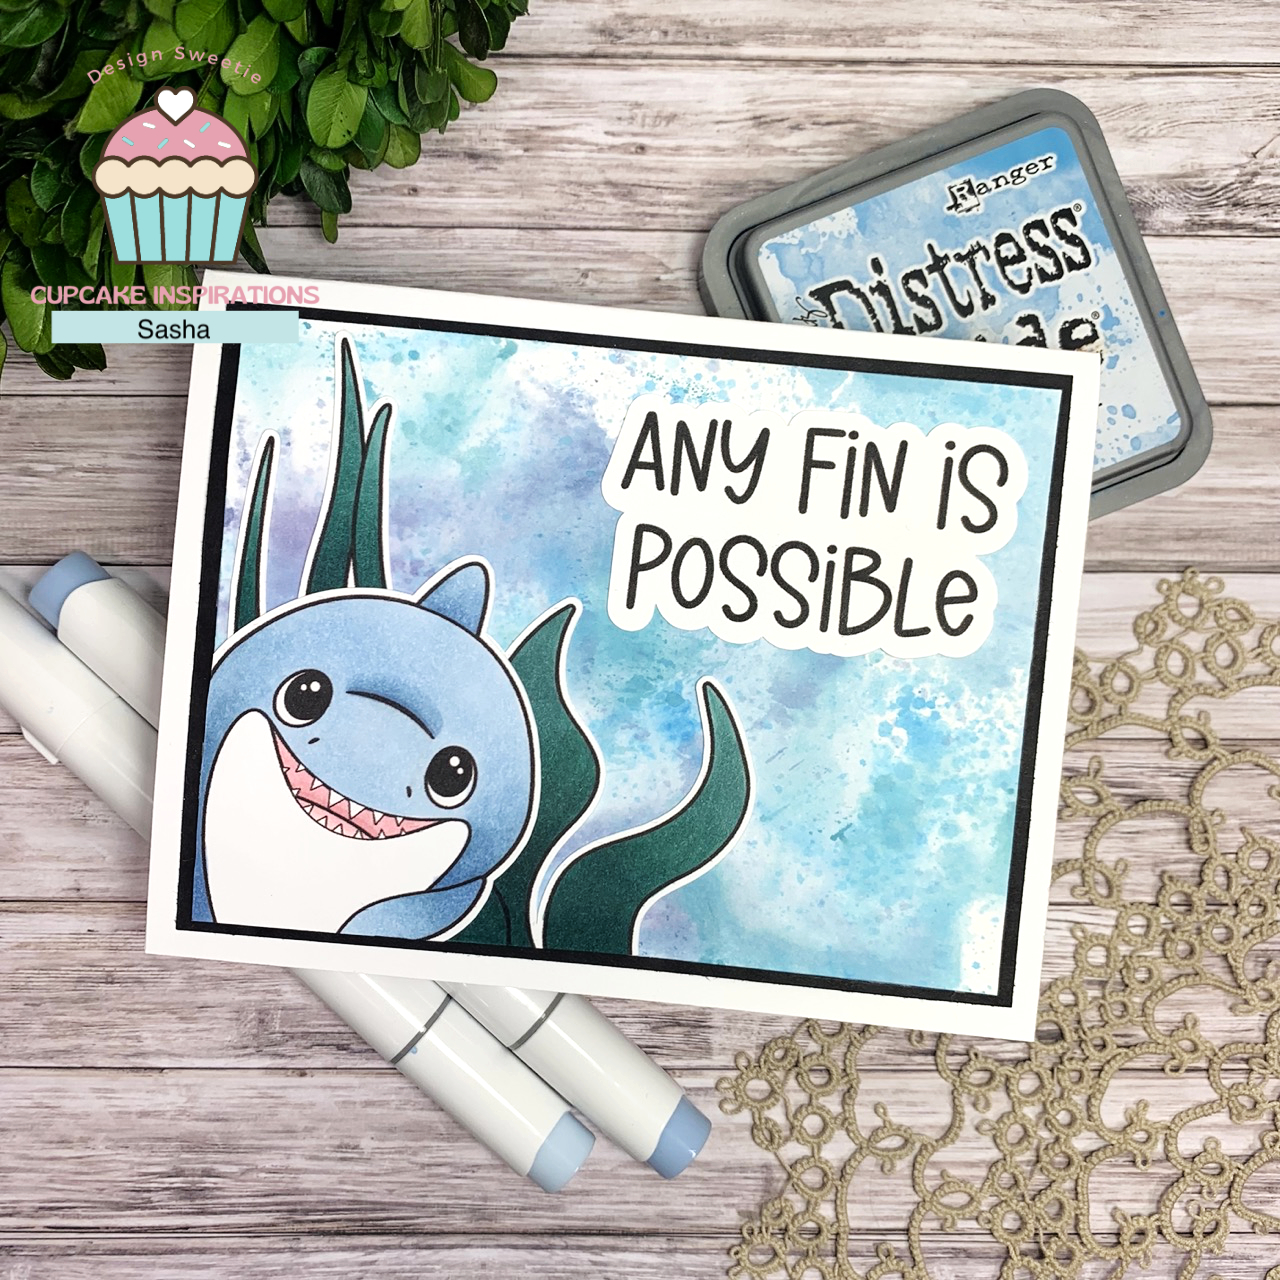
As for my card, I used the Proud digi stamp created by Jane’s Doodles exclusively for this hop! I coloured the image using the following Copics:
- Reds: R02, R08
- Yellows/Oranges: Y11, Y13, Y15, Y21, YR00, YR04, YR07, YR14, YR23, YR24
- Greens: G07, G12, G24 G28, G99, YG03, YG13, YG17
- Browns: E11, E15, E29, E33, E37, E49
- Greys: C1, C3, C5, W5, W7, W9

The background was created using Mowed Lawn Distress Oxide and splattering water and white acrylic paint using a fan brush (a technique I have been loving recently)!
Be sure to head on over to Instagram to hop along for a chance at winning some amazing prizes!
Thanks for reading. Catch ya next time!
Sasha J
Products Used
- Jane’s Doodles Proud Digi Stamp
- Copic Sketch Markers
- Mowed Lawn Distress Oxide
- Liquitex Basics Titanium White Acrylic Paint
- Royal & Langnickel Fan Brush #2
- Bearly Art Glue