IMG_7591

How to Make Quick and Easy DIY Christmas Cards Using Embossing Folders

This post contains affiliate links that are of no extra cost to you. Using my affiliate links simply helps me to keep doing what I love – thank you!

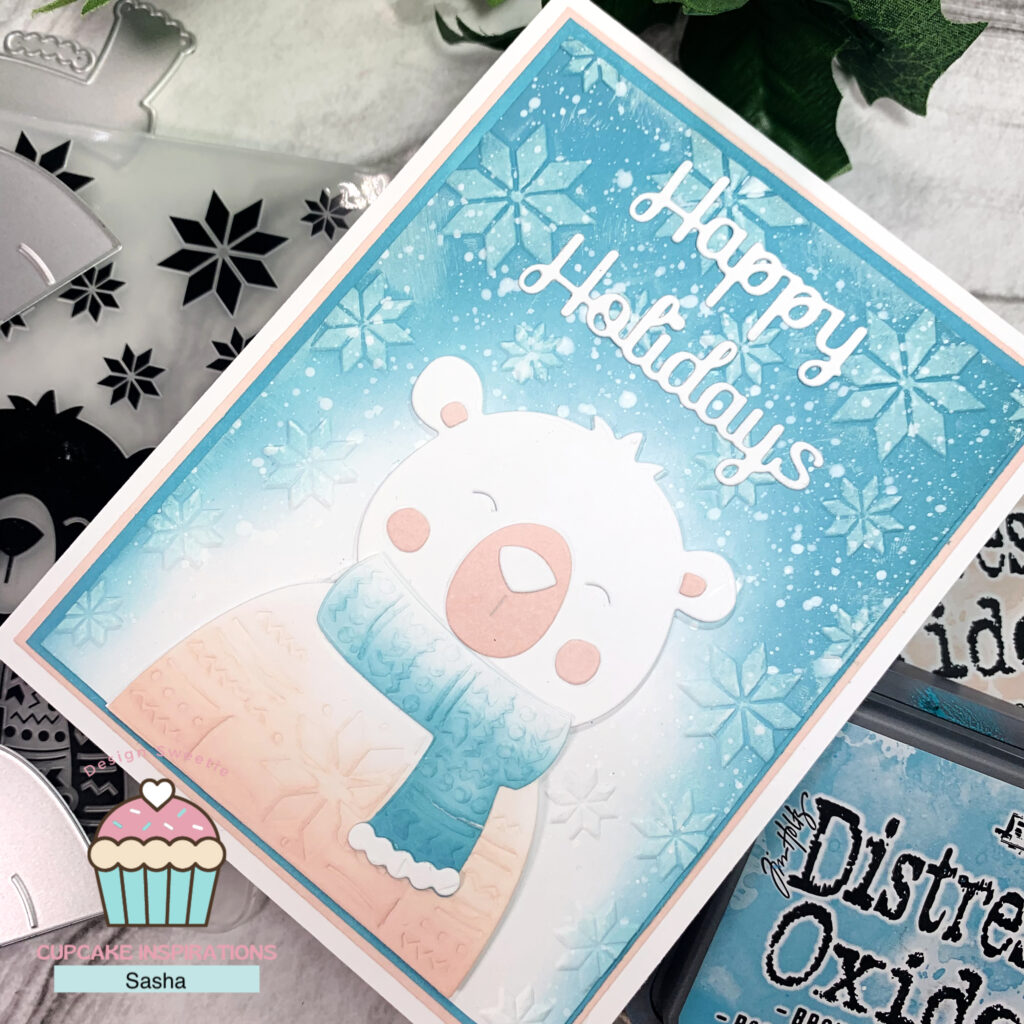
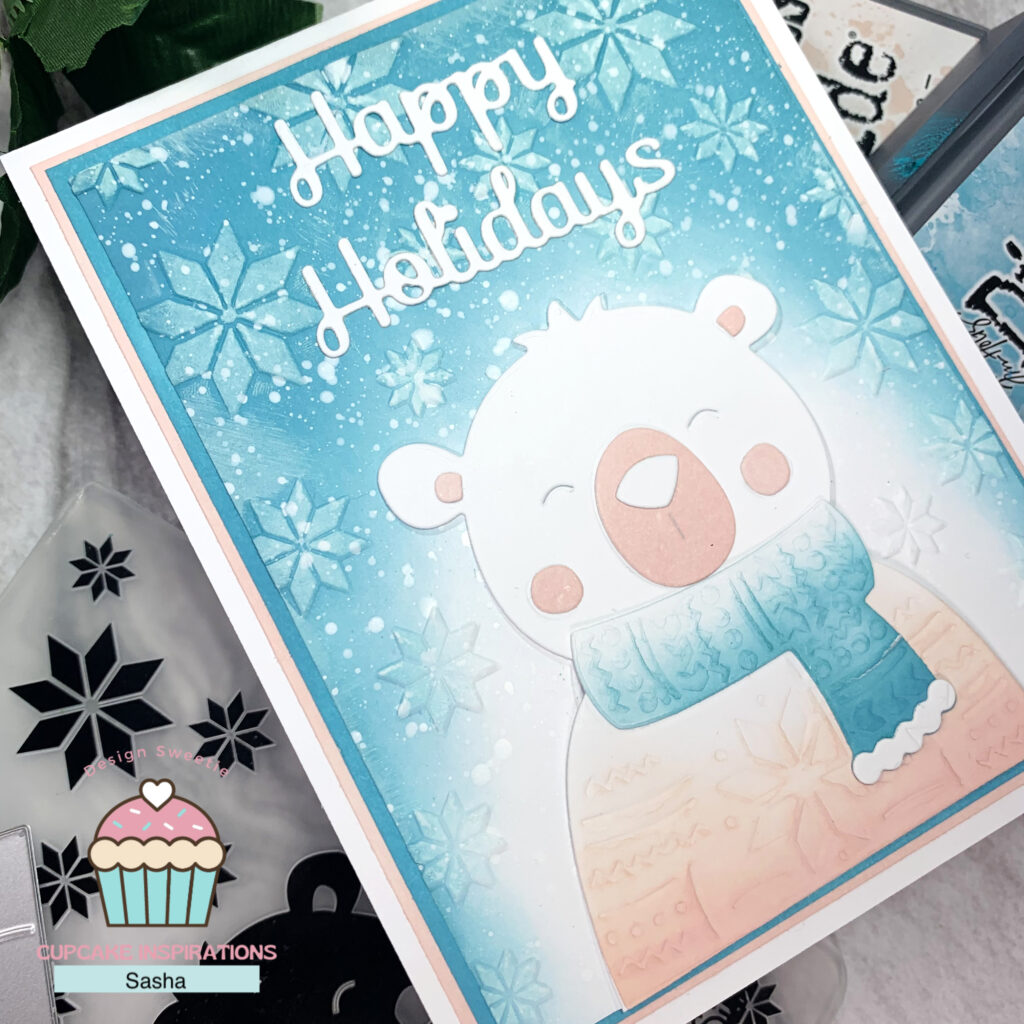
Looking for some easy-to-make DIY Christmas cards this holiday season? Look no further than embossing folders! ❄️🎄

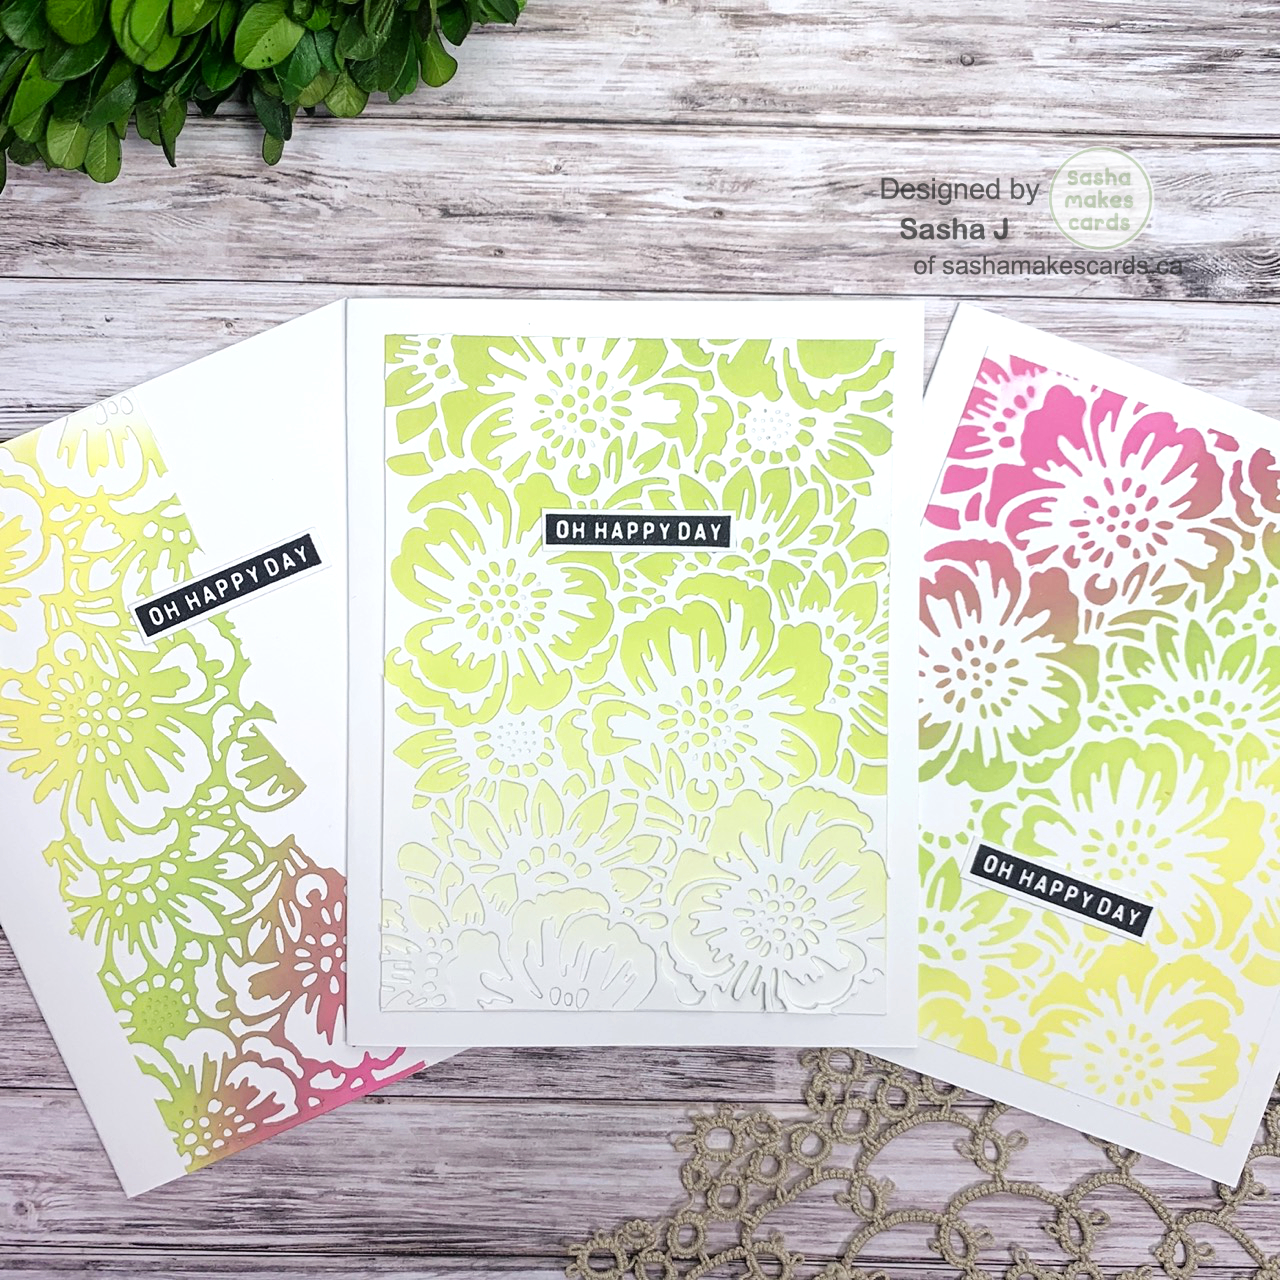
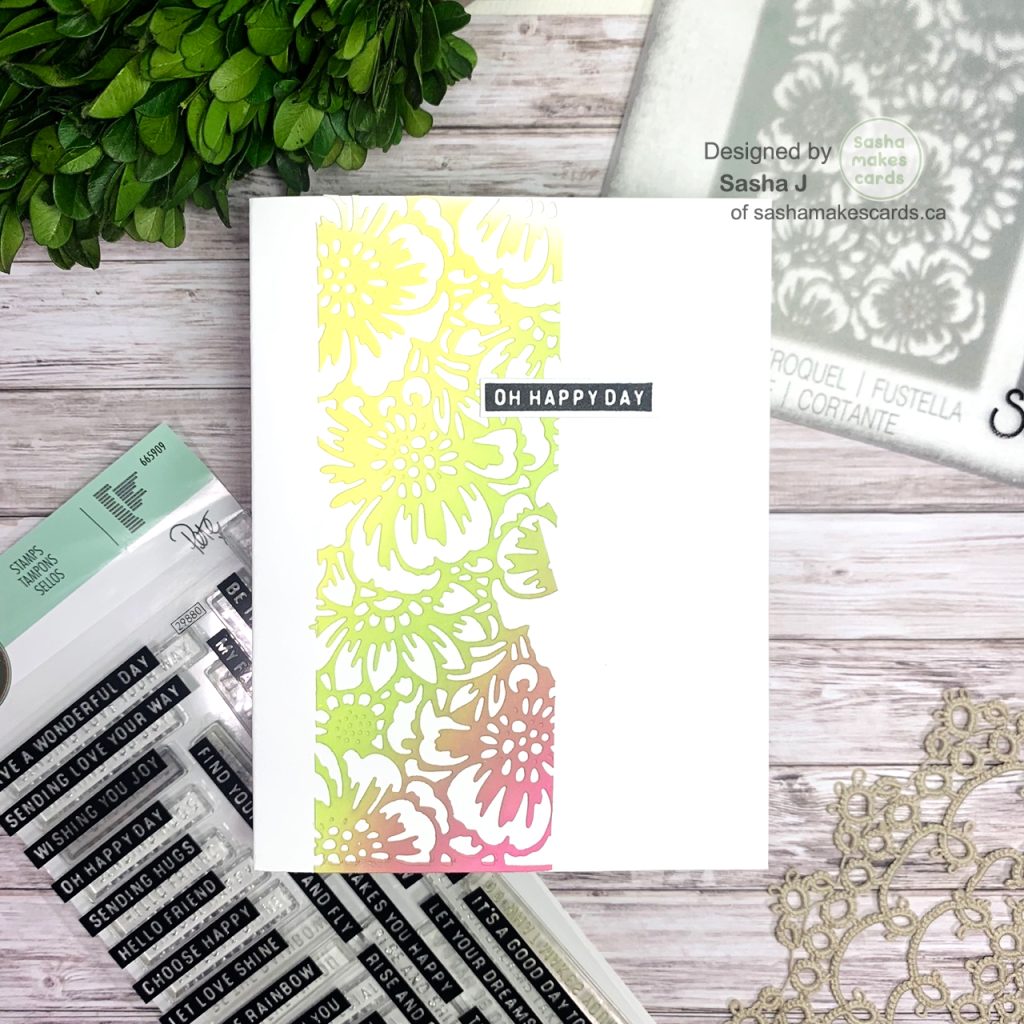
While I don’t often reach for embossing folders (perhaps because I don’t have many), they are one of the easiest ways to take handmade cards to the next level. With so many techniques to experiment with and so many options from a ton of amazing brands, embossing folders really do offer something for everyone, especially during the chaos of the holiday season!

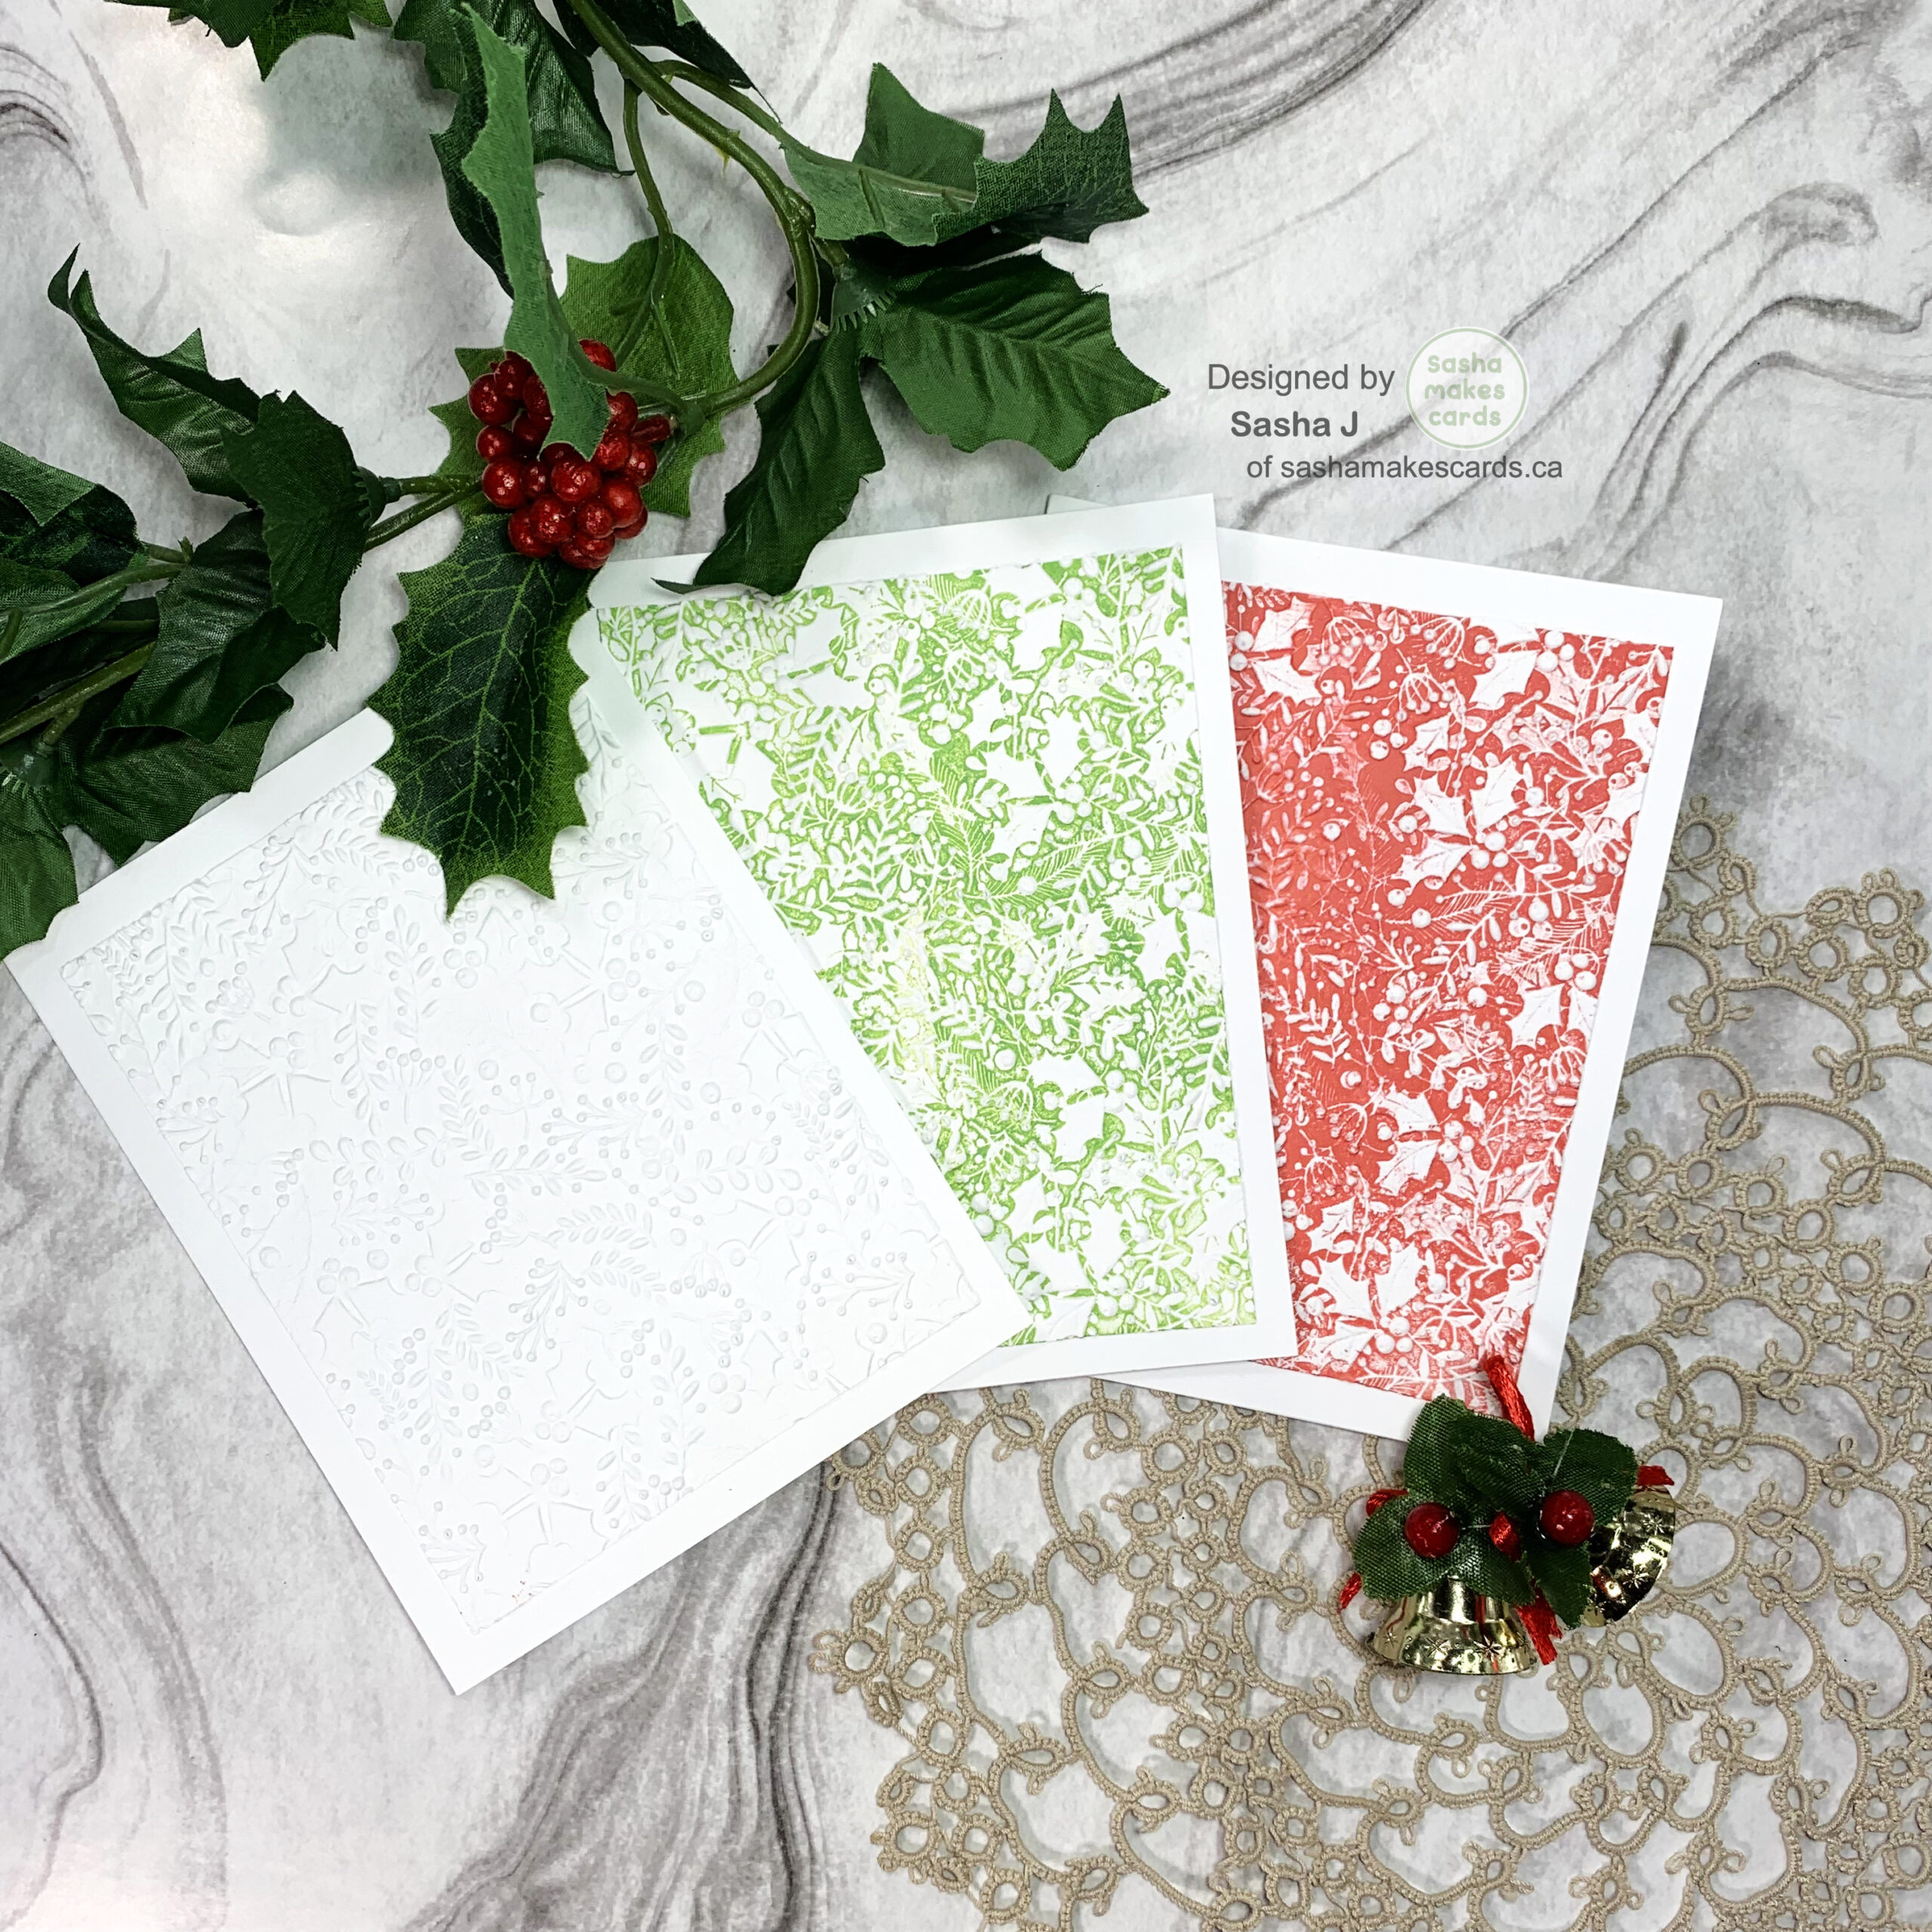
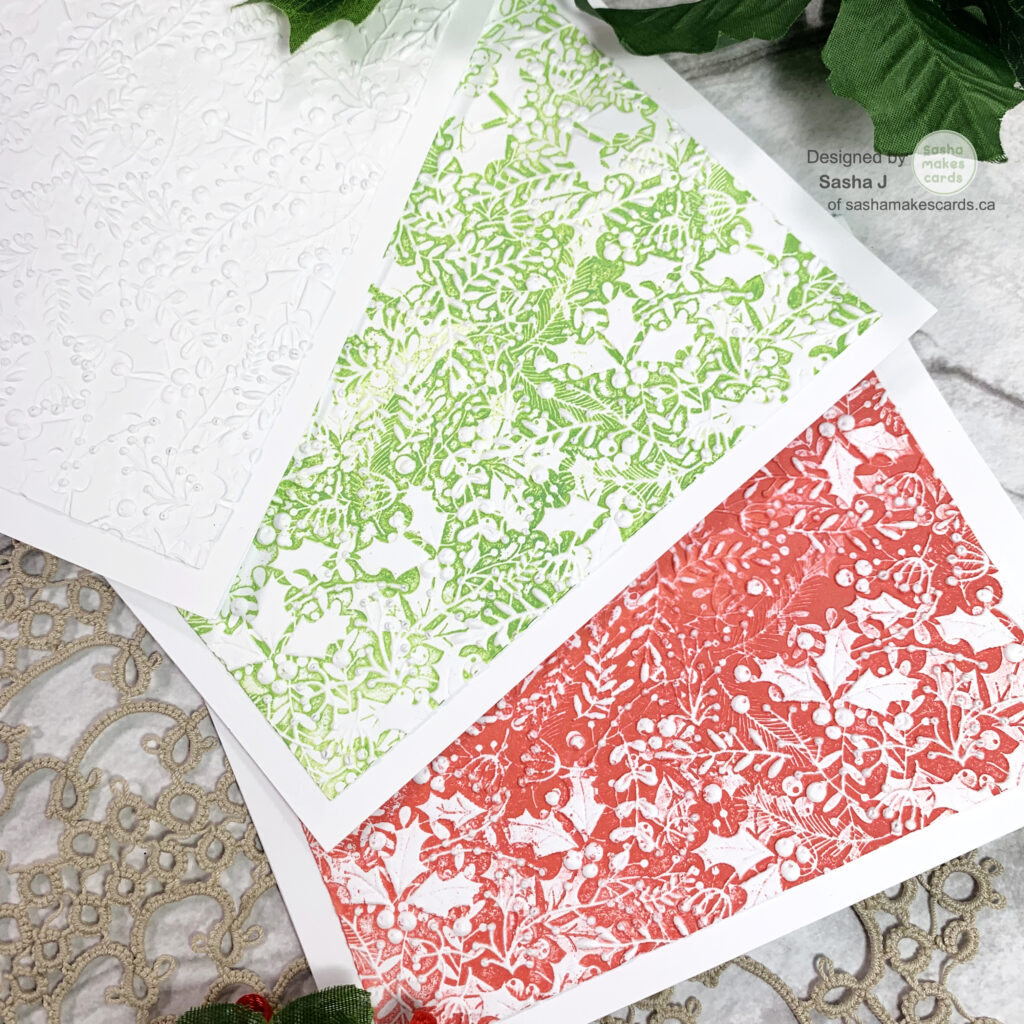
The embossing folder I am using here is the Winter Foliage 3-D Textured Embossing Folder from Sizzix. As for the technique, here is what I did:

  • Simply rub your ink of choice (I’m using Distress Oxides from Ranger Ink) on the flat side of the folder
  • Spray your cardstock with water
  • Run your embossing folder and cardstock through your die-cutting machine for a beautiful, inky look!

Also, simply using your embossing folder with no ink will give a more clean and simple yet still beautiful effect.

Check out the process video posted to TikTok here:

@sashamakescards

Embossing folders are definitely one of the best ways to make quick and easy Christmas cards this holiday season! 🎄🎄 check out my blog www.sashamakescards.ca to shop the supplies I used! #cardmaking #cardmakingideas #christmas

♬ Sleigh Ride – Ella Fitzgerald

To finish, glue your card panel to a card base, I used Bearly Art Glue.

Ta-da! It’s that easy to create Christmas cards for your loved ones.

Since I mentioned that there are so many embossing folders available, here are some other beautiful and fun embossing folders perfect for creating quick and easy, no-fuss Christmas and holiday cards:

Holiday Knit Multi-Level Texture Fades Embossing Folder by Tim Holtz – Sizzix

Buy From

Playful Poinsettia 3D Embossing Folder – Spellbinders Simon Hurley

Buy From

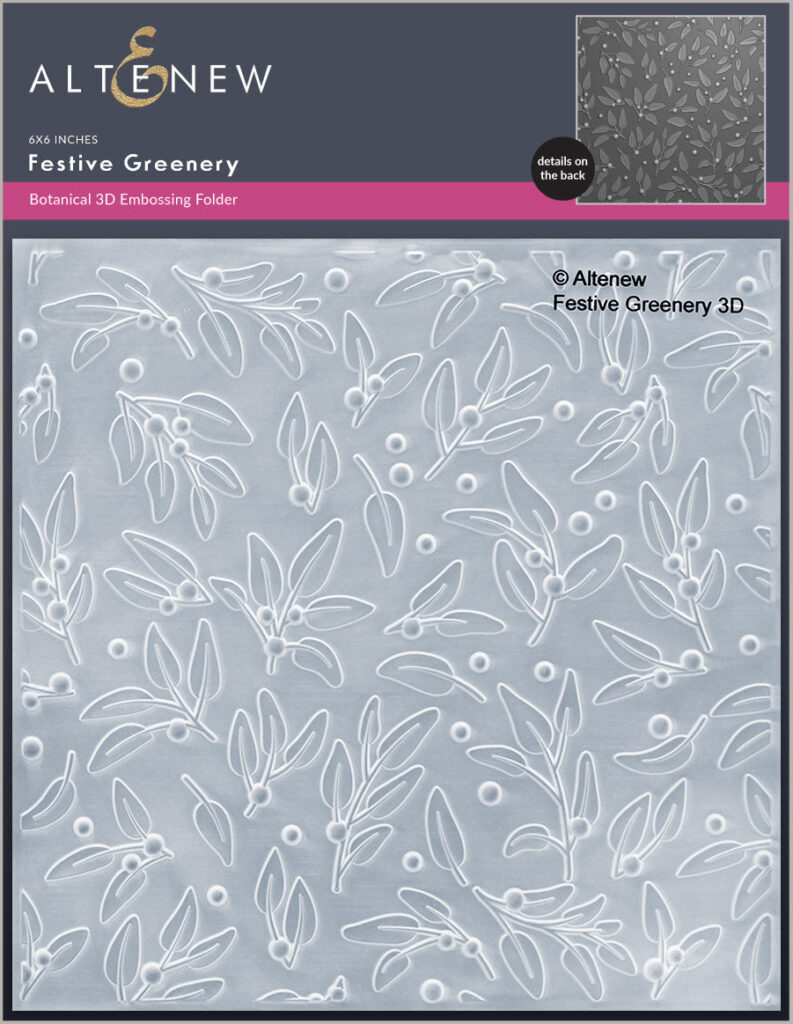
Festive Greenery 3D Embossing Folder – Altenew

Buy From

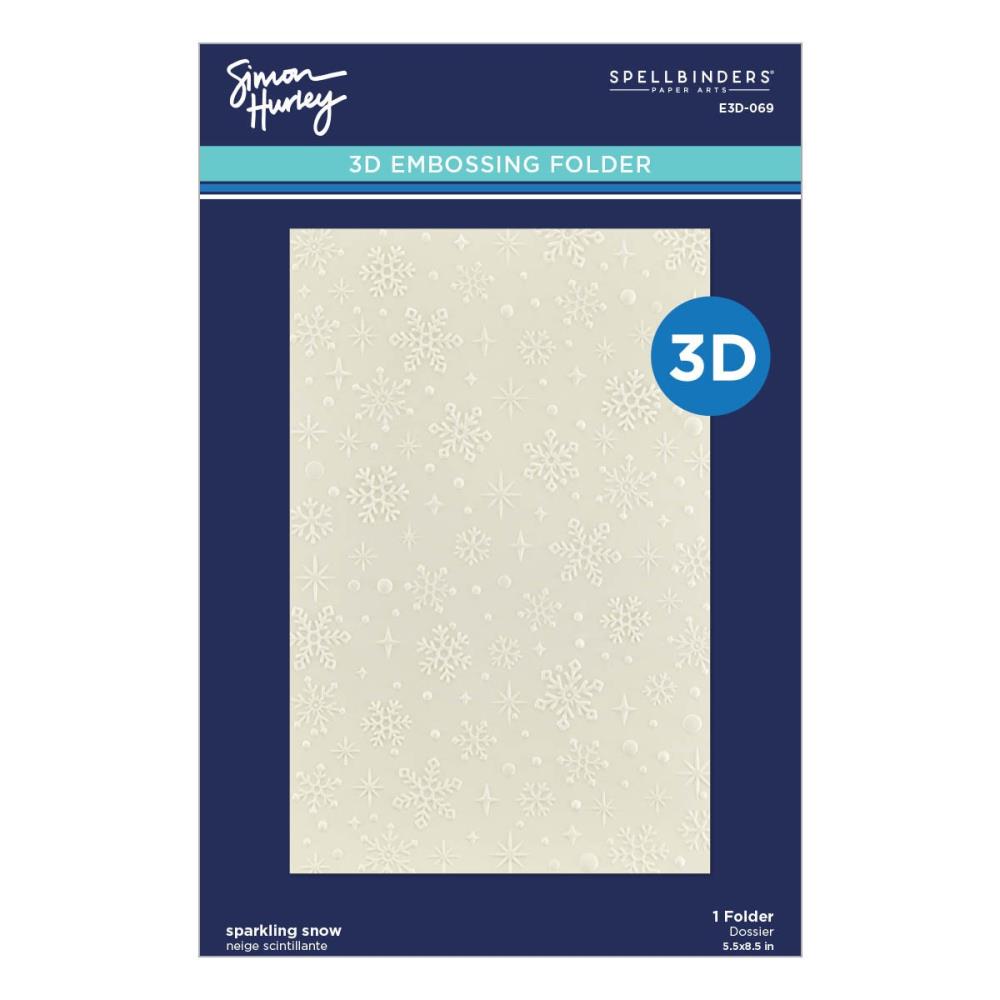
Sparkling Snow 3D Embossing Folder – Spellbinders Simon Hurley

Buy From

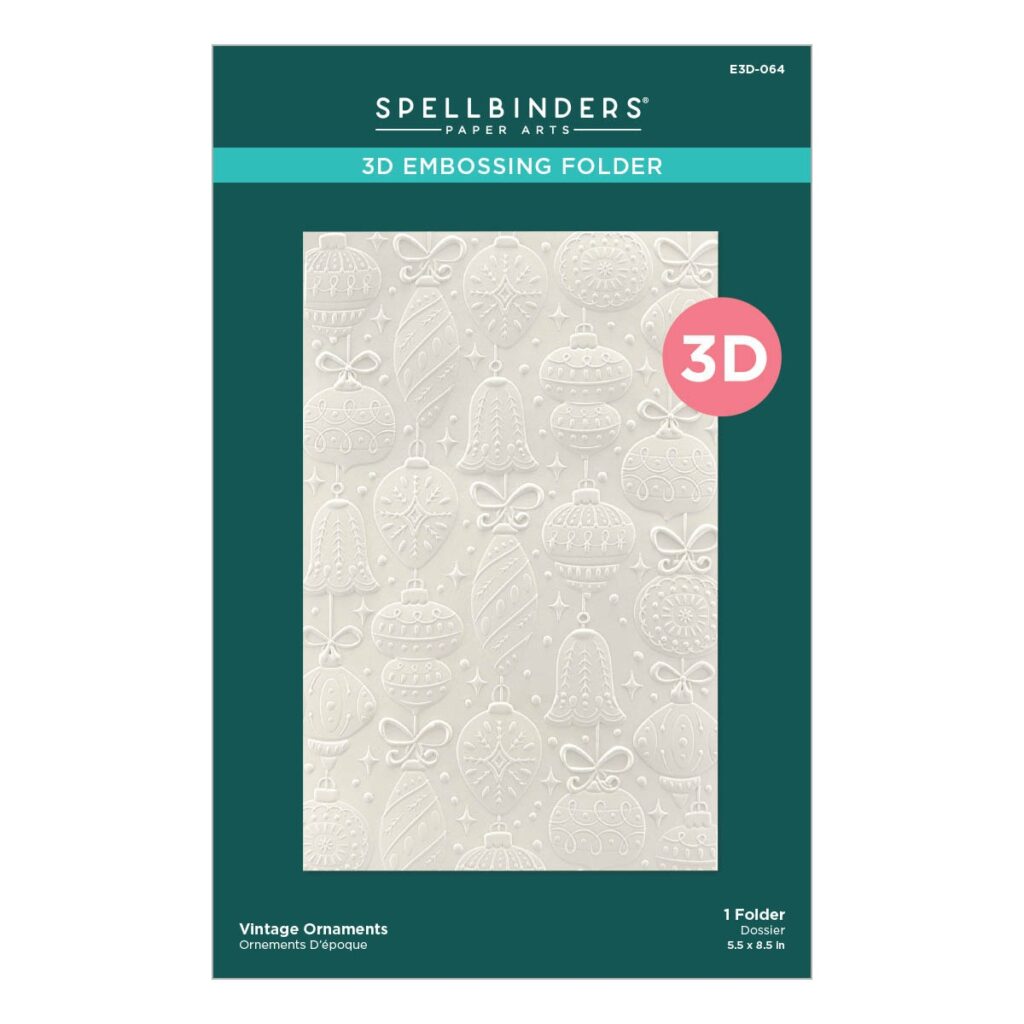
Vintage Ornaments 3D Embossing Folder – Spellbinders

Buy From

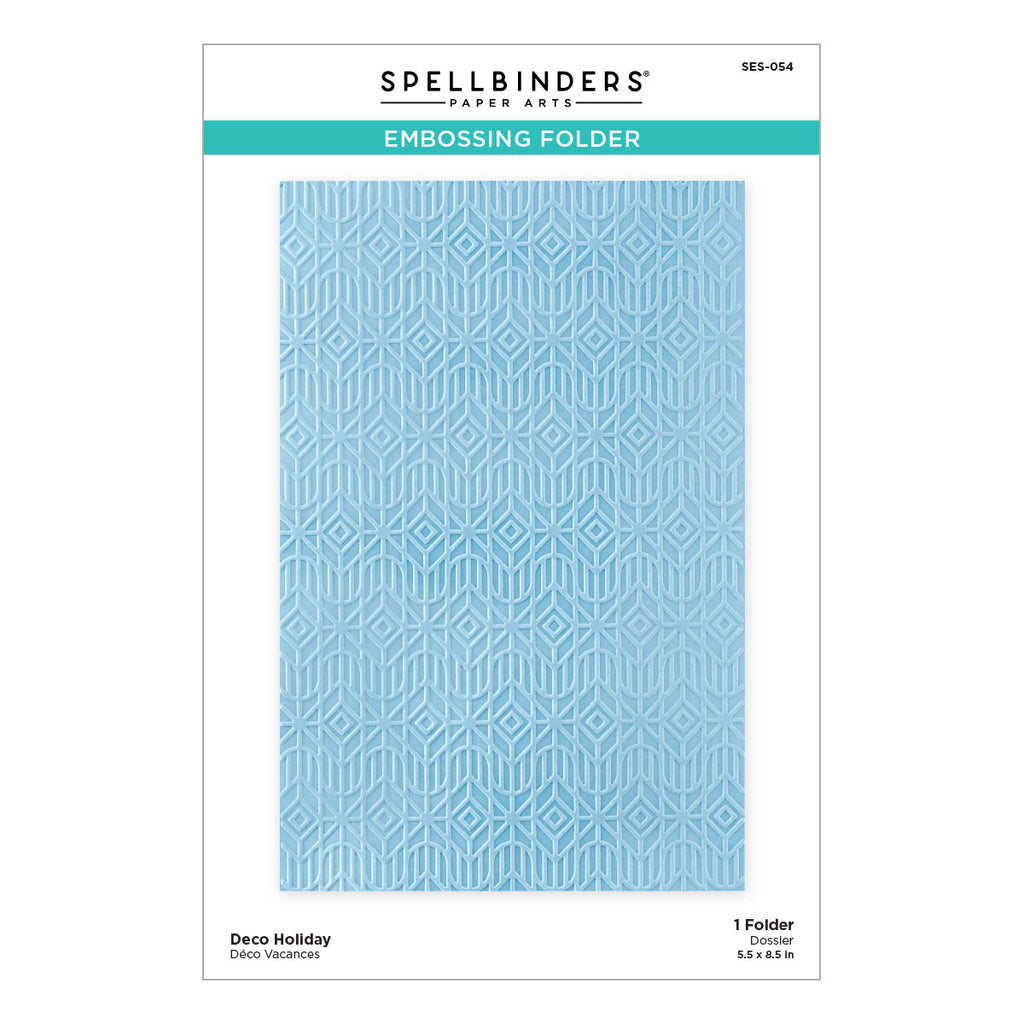
Deco Holiday Embossing Folder

Buy From

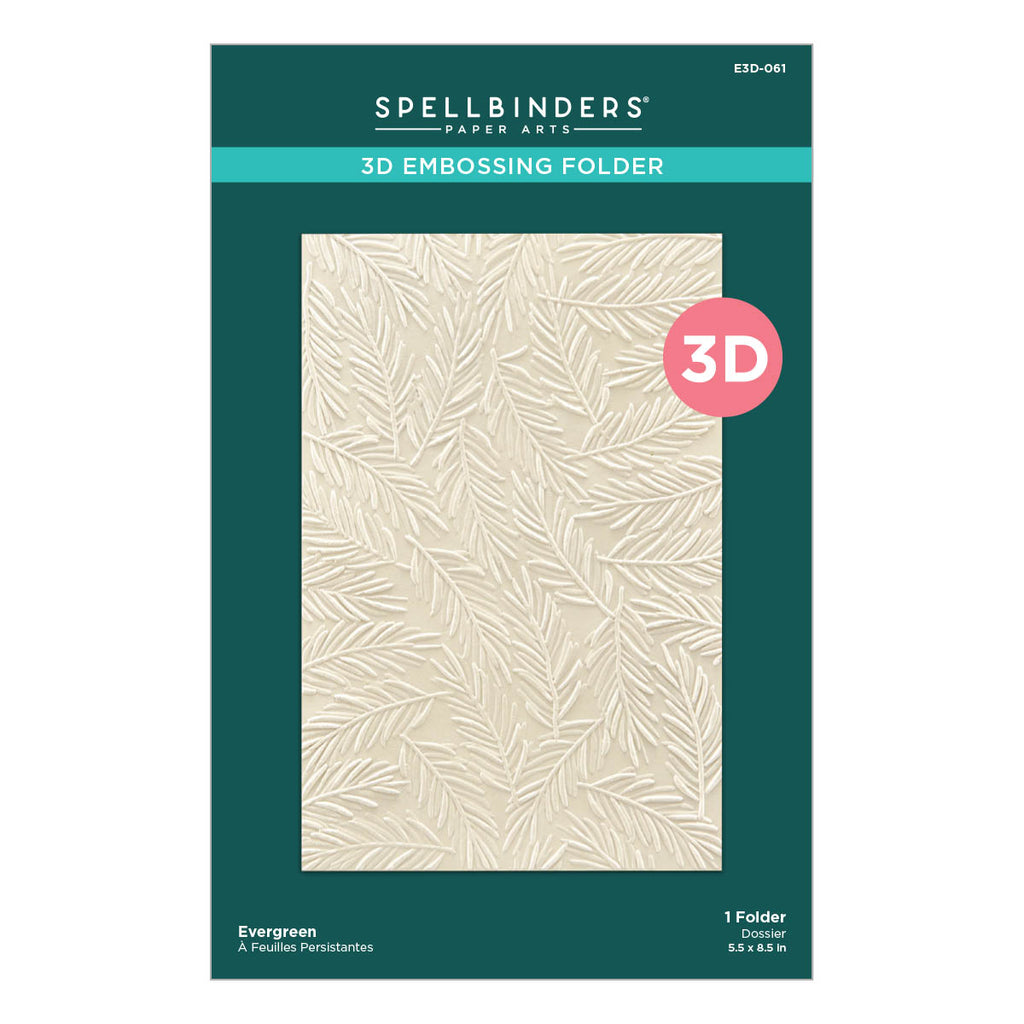
Evergreen 3D Embossing Folder – Spellbinders

Buy From

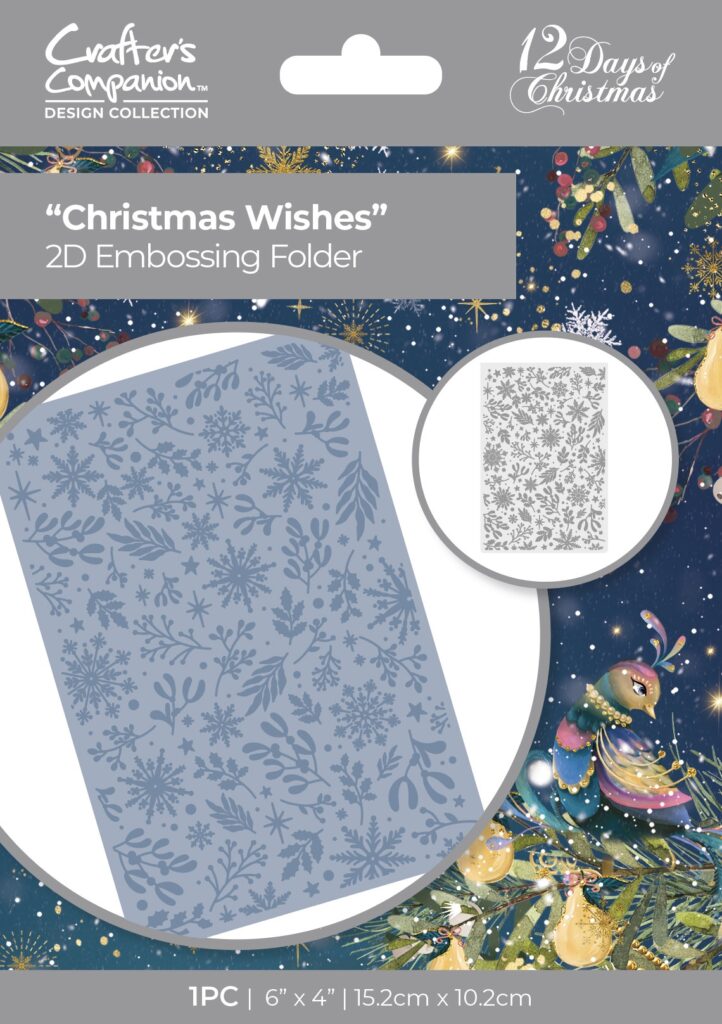
Christmas Wishes 2D Embossing Folder – Crafter’s Companion

Buy From

Thanks for reading. Catch ya next time!

Sasha


Products Used

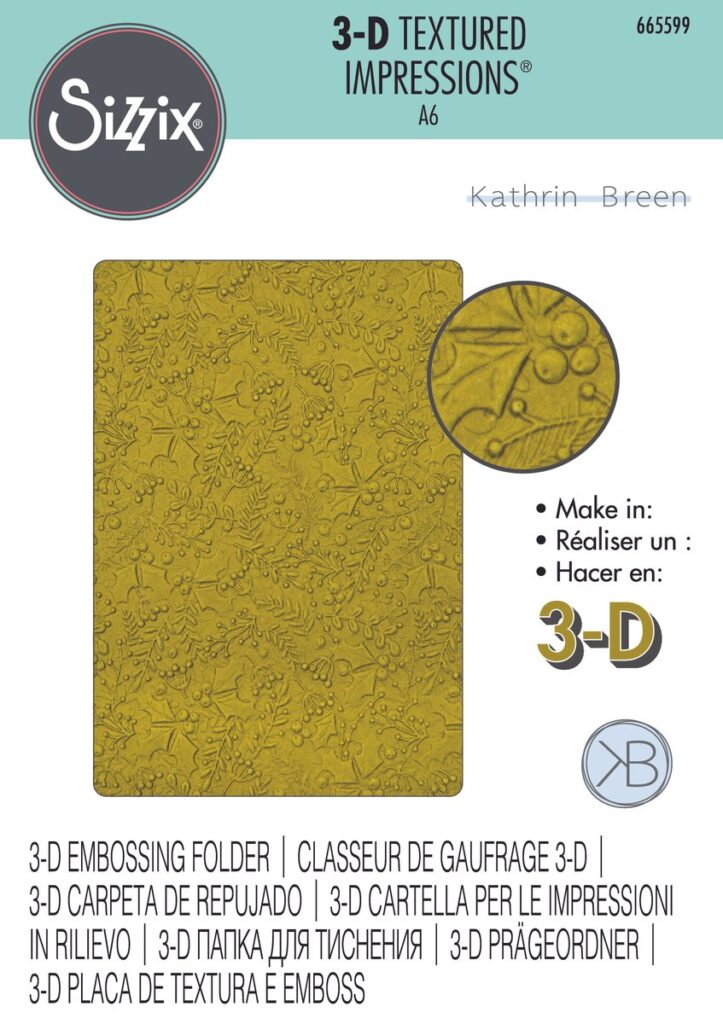
Winter Foliage 3-D Textured Impressions Embossing Folder

Buy From

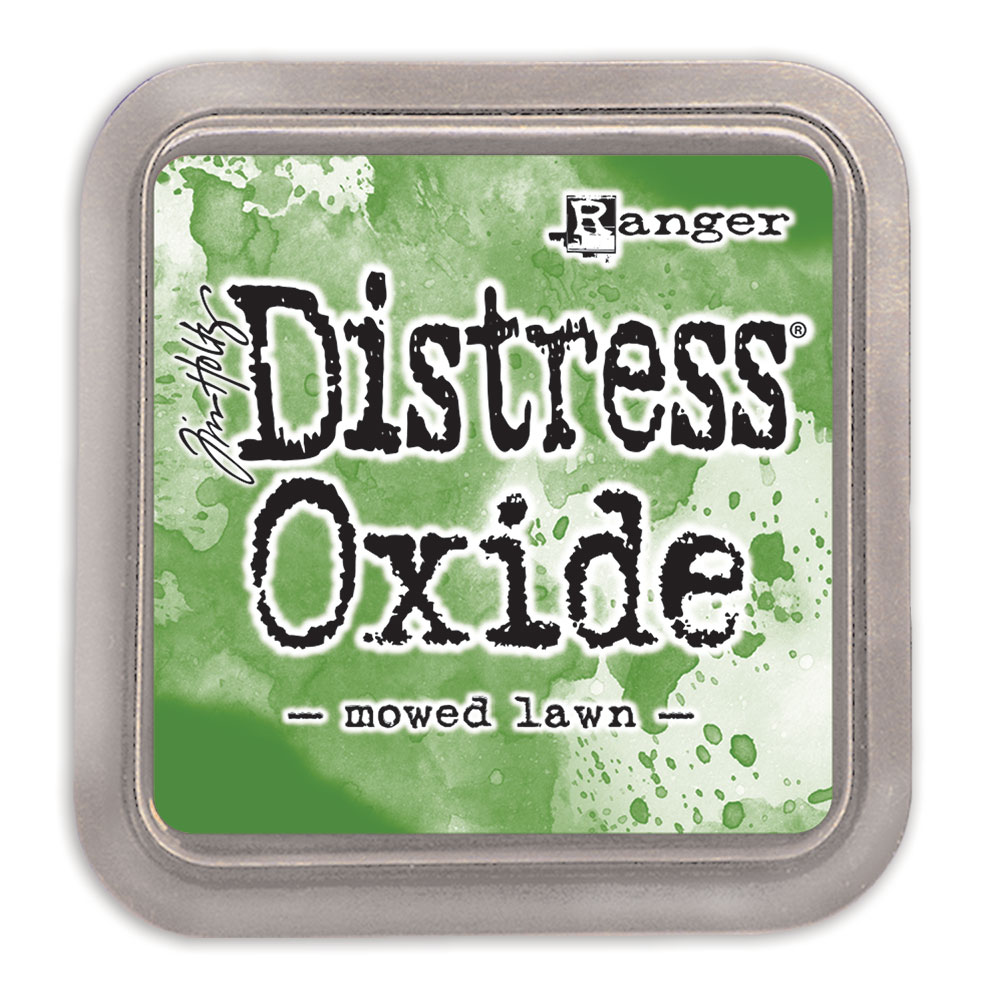
Mowed Lawn Tim Holtz Distress Oxide Ink Pad

Buy From

Candied Apple Tim Holtz Distress Oxide Ink Pad

Buy From

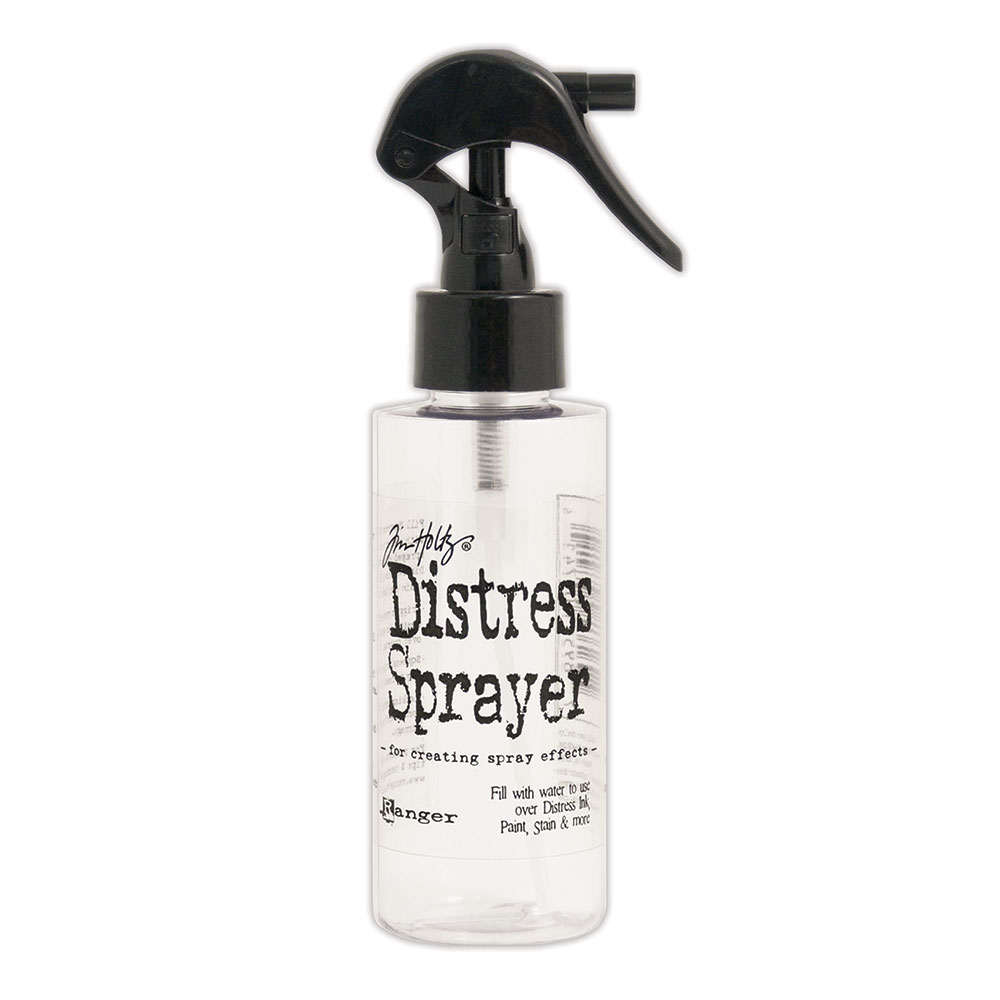
Tim Holtz Distress Sprayer

Buy From

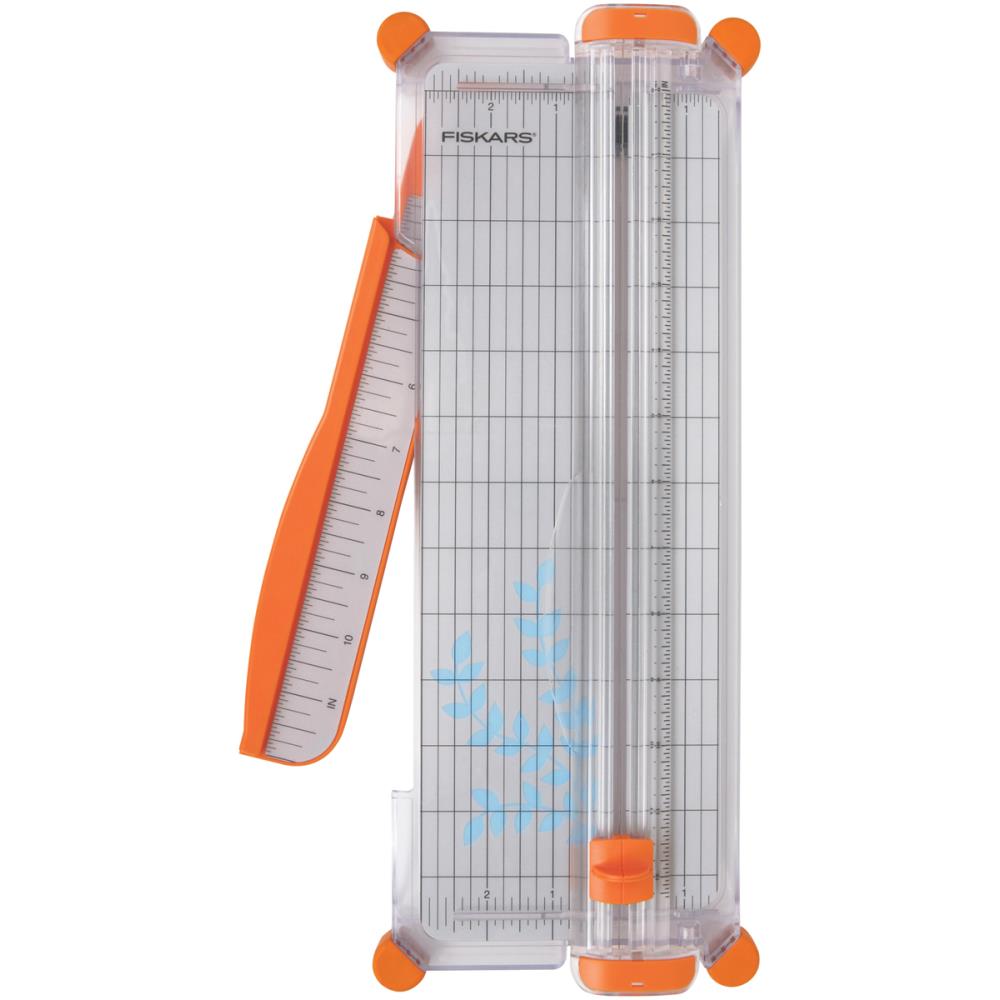
12″ Portable Fiskars Paper Trimmer

Buy From

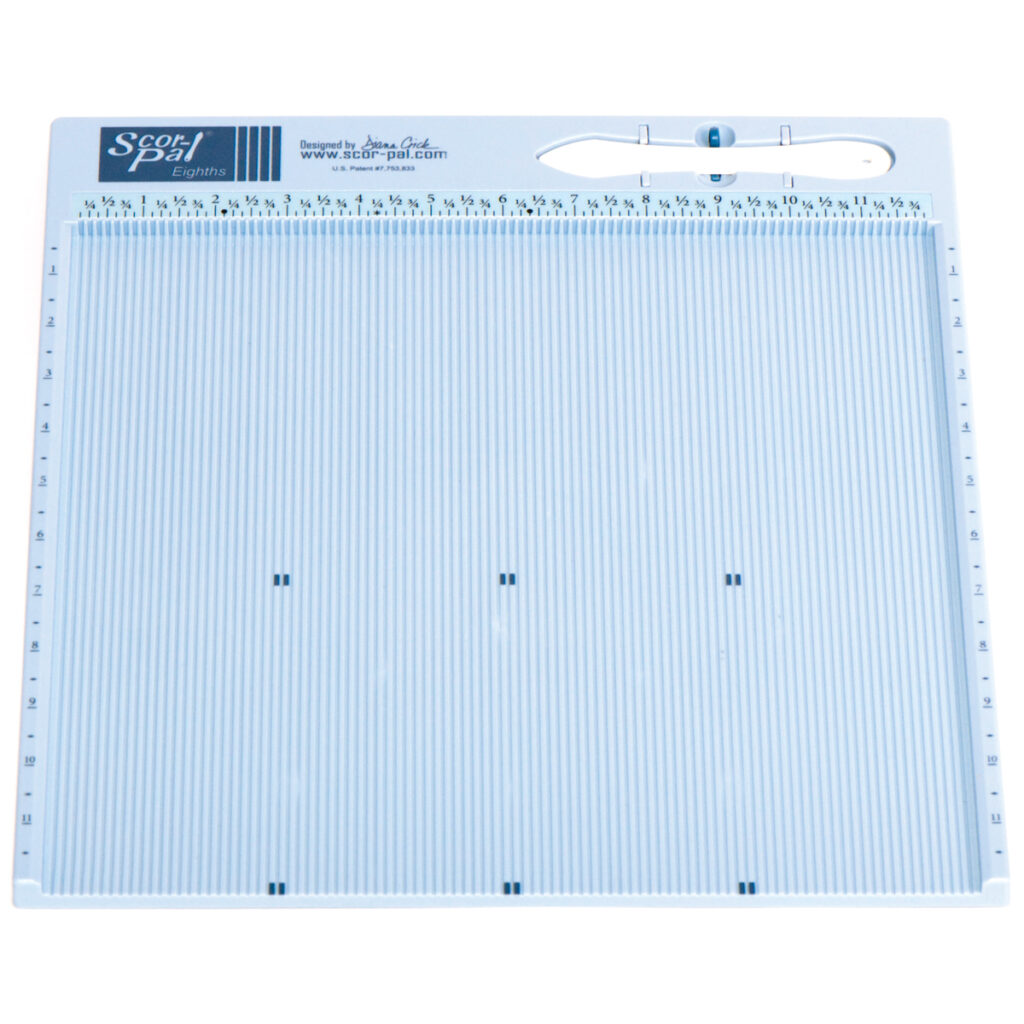
Scor-Pal Eights Measuring & Scoring Board – 12″ X 12″

Buy From

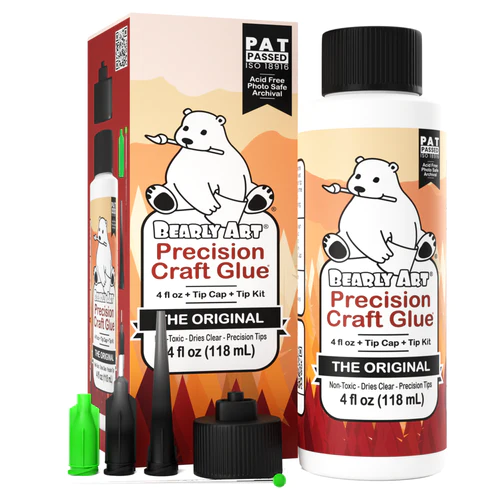
Bearly Art Precision Craft Glue – THE ORIGINAL

IMG_7534

Cozy Bear Winter Wonderland Scene – CIC #584

This post contains affiliate links that are of no extra cost to you. Using my affiliate links simply helps me to keep doing what I love – thank you!

Hello friends! Today is the start of a new challenge over on the Cupcake Inspirations Challenge blog! The theme for challenge #584 is Winter Wonderland. This challenge is also the last challenge of the year!

To create my card, I used the Sizzix Cozy Bear Die and Embossing Folder Set as the main focus and a sentiment from the Spellbinders Holiday Sentiments set.

First, I used Broken China Distress Oxide and ink-blended a background panel before running the panel through the Cozy Bear Embossing Folder. After embossing, I used Simon Says Stamp White Pigment Ink to swipe and dab on white pigment to the embossed snowflakes and splattered using Liquitex Titanium White Acrylic Ink.

Once the background was done, I embossed a few scraps of white cardstock and then die-cut the different elements of the bear.

I used Tattered Rose Distress Oxide to ink-blend the sweater and Broken China Distress Oxide to ink-blend the scarf. I also used these colours to ink-blend matching mats for my card.

Once everything was done, I adhered all elements together using Bearly Art Glue.

Be sure to head on over to the Cupcake Inspirations Challenge Blog to submit a card and participate in the Winter Wonderland challenge!

Thanks for reading. Catch ya next time!

Sasha


Products Used

4th july

Fourth of July – Spellbinders & Sizzix

Hello friends and Happy Fourth of July! While I may be Canadian, I had an idea for a fun (and simple) red, white, and blue Fourth of July card and just wanted to share it!

Using my Fiskars 12″ Portable Paper Trimmer, I trimmed small strips of red, white, and blue cardstock and then glued them onto a piece of white cardstock.

Using the Spellbinders Colour Block Slices etched dies, I then die-cut a couple of triangles when I then glued to an A2 card front.

As for the sentiment, I used the Sizzix Celebration Words: Script Thinlits by Tim Holtz die set.

Thanks for reading. Catch ya next time!

Sasha J


Products Used

  • Spellbinders Colour Block Slices etched dies
  • Sizzix Celebration Words: Script Thinlits by Tim Holtz
  • Neenah Astrobright Cardstock
  • Bearly Art Glue
  • Fiskars 12″ Portable Paper Trimmer
IMG_5411 Large

Old-fashioned Brick Building – CR #169

Hello friends! Today’s card is my submission for episode #169 of Craft Roulette, which has the following parameters:

I had a lot of fun creating this card and experimenting with some styles and techniques I have not used before!

Once I die-cut the window from my card front using the Spellbinders The Sweet Shoppe cutting dies, I started by creating the brick building using Distress Oxides/Inks and the HoneyBee Stamps Perfect Brick Stencil. I also added some brown paint onto the bricks for a more “old-fashioned” look. I used the following Oxides/Inks for the brick wall:

  • Frayed Burlap
  • Vintage Photo
  • Ground Espresso
  • Candied Apple

The black window was distressed using silver paint along with Carved Pumpkin Distress Ink to create rust.

As for the awning (also from The Sweet Shoppe cutting dies set), I used the Star Six stencil from Ciao Bella Paper with Frayed Burlap, Black Soot, Mowed Lawn, and Ground Espresso Distress Oxides/Inks.

The wooden window box (along with the wooden sign with a sentiment from Sizzix) were created using – you guessed it – more Distress Oxides/Inks as well as brown paint! I used the following colours for the wood:

  • Frayed Burlap
  • Vintage Photo
  • Ground Espresso

I used these Copics to colour the dog from the Mama Elephant Puppy Play set:

  • Browns: E15, E18
  • Pinks: R20, R22

The plants were die-cut from various colours of Neenah Astrobright Cardstock and Recollections Cardstock using the Sizzix Garden Shed Die Set designed by Sophie Guilar.

Thanks for reading. Catch ya next time!

Sasha J


Products Used

  • Spellbinders The Sweet Shoppe Cutting Dies by Tina Smith
  • Sizzix Gaden Shed Thinlits by Sophie Guilar
  • Sizzix Good Vibes #3 by Pete Hughes
  • Honey Bee Stamps Perfect Brick Stencil
  • Ciao Bella Paper Star Six Stencil
  • Mama Elephant Puppy Play Stamp and Die Set
  • Copic Sketch Markers
  • Black Soot Distress Oxide
  • Lost Shadow Distress Oxide
  • Frayed Burlap Distress Oxide
  • Vintage Photo Distress Ink
  • Ground Espresso Distress Ink
  • Candied Apple Distress Oxide
  • Mowed Lawn Distress Oxide
  • Carved Pumpkin Distress Ink
for settings

One Die and Stamp Three Ways! – Sizzix

Hi friends! Today I am participating in a hop over on Instagram called Create it Three Ways, a monthly hop where we choose a category (I chose a same stamp and die) and create three different cards! The theme for this month is “summer” and I had a lot of fun creating this set of three summer floral cards in tropical colours!

I created all three cards using the Sizzix Bouquet Thinlits Die by Tim Holtz and a sentiment from the Sizzix Good Vibes #3 Stamp set by Pete Hughes and three tropical distress oxides: Twisted Citron, Pickled Raspberry, and Squeezed Lemonade.

For my first card, I placed the die-cut panel on another panel that I had ink blended a gradient of Twisted Citron going dark to light.

For this card, I used the die-cut panel as a stencil, blending a gradient of the three distress oxides onto a card front.

For my last card, I trimmed down the panel I used as a stencil and adhered it to my card base.

I don’y usually make many cards featuring the same products all at once so I had a lot of creating this set of three summer cards!

Be sure to check out the hop on Instagram so that you can hop along and see all the other amazing cards from some amazing crafters!

Thanks for reading. Catch ya next time!

Sasha J


Products Used

  • Sizzix Bouquet Thinlits Die by Tim Holtz
  • Sizzix Good Vibes #3 Stamp set by Pete Hughes
  • Twisted Citron Distress Oxide
  • Pickled Raspberry Distress Oxide
  • Squeezed Lemonade Distress Oxide
IMG_5210 Large

Paper Piecing a Thank You Card – Sizzix

Hi friends! This card is my submission for episode #167 of Craft Roulette! Here were the parameters:

Using the Sizzix Bird Scene Thinlits die set designed by Jenna Rushforth and the Sizzix Funky Floral #1 Thinlits die set designed by Tim Holtz, I die-cut a bird and a bunch of flowers in farmer’s market colours to fit the theme of the challenge. Before assembling the flowers, I used Distress Oxides/Inks on the edges of the flowers and leaves to add some more colour/interest. I used the following Distress Oxides/Inks:

  • Ground Espresso
  • Vintage Photo
  • Black Soot
  • Frayed Burlap
  • Mowed Lawn
  • Faded Jeans
  • Spiced Marmalade
  • Candied Apple

After assembling all the bird and flowers, I die-cut a thank you sentiment from the Sizzix Celebration Words: Script Thinlits Dies designed by Tim Holtz.

Once ready, I attached my card front onto a black cardstock panel which was then attached to A2 card base.

I had a lot of fun putting this card together. Whenever I do a card with no colouring and little to no stamping, it reminds how much die-cutting and paper piecing can be!

Thanks for reading. Catch ya next time!

Sasha J


Challenges Entered

Craft Roulette – Episode #167

Happy Little Stampers – Anything Goes with Dies

Critter Crazy Challenges – Anything Goes with a Featured Critter


Products Used

  • Sizzix Bird Scene Thinlits die set designed by Jenna Rushforth
  • Sizzix Funky Floral #1 Thinlits die set designed by Tim Holtz
  • Sizzix Celebration Words: Script Thinlits Dies designed by Tim Holtz
  • Distress Oxides/Inks
  • Bearly Art Glue
  • Black Fine Point Sharpie
  • Neenah Astrobright Cardstock
IMG_4830 Small

A Vintage Tea Party – Tim Holtz

Hi friends! Today’s card is my submission for craft roulette episode #164, which has the following parameters:

Once I looked through my stash – I saw the perfect stamp set for this card and knew exactly what I wanted to do.

Using Stampers Anonymous Mini Bird Crazy and Things stamp set from the Tim Holtz collection, I stamped several images and coloured them using the following tea party coloured Ohuhu alcohol markers:

Green Bird: G9, G240, G220, CG2, CGII00

Pink Bird: RV180, RV270, RV260, CG2, CGII00

I also die-cut the sentiment “best wishes” from the Sizzix Celebration Words: Script Thinlits by Tim Holtz three times to stack them to add dimension.

Now, I could go onto the super fun part… experimenting with the background! Using Ground Espresso, Vintage Photo, and Frayed Burlap Distress Oxides/Inks, I added colour to the card front to create a vintage/old effect. Then, I added coffee/tea stains by mixing Frayed Burlap Distress Oxide with water and running alcohol, placing the bottom of my spray bottle in the mixture, and stamping it onto my card front. I love how real this effect looks – I will definitely incorporate this technique into more cards in the future! I also splattered some of this mixture on my card using a Royal and Langnickel fan brush.

As for the hand-drawn lines, I drew brown circles in the corners of the card using a fine-line brown Sharpie to add to the coffee effect.

To finish, I attached everything to my card front and then to a mini slimline card base.

Thanks for reading. Catch ya next time!

Sasha J


Products Used

  • Stampers Anonymous Mini Bird Crazy and Things
  • Sizzx + Tim Holtz Celebration Words: Script
  • Distress Oxides/Inks
  • Ohuhu Alcohol Markers
  • Lawn Fawn Jet Black Premium Ink Pad
  • Spray Bottle with Water
  • Rubbing Alcohol
  • Brown Fine-line Sharpie
  • Bearly Art Glue
  • Hammermill 100 LB Cardstock
  • Fiskars 6” Spring Assisted Scissors
IMG_4797 Large

Two Embossing Powder Techniques in One! – Ciao Bella Paper & Sizzix

Hi friends! While doing some experimenting with some techniques using embossing powder the other day, I created two samples on small pieces of cardstock (as I had no intention of making a card using these pieces). However, I really liked how they turned out so I decided to make a card out of it! You just got to love a completely improvised card!

Using the Star Six stencil from Ciao Bella Paper, I first applied clear embossing ink right onto the stencil and stamping it onto a scrap of white cardstock. For the other way, I layed my stencil on a piece of scrap white cardstock and applied the embossing ink to the cardstock normally. For both samples, I used Princess Gold Embossing powder.

I chose a sentiment from Celebration Words: Script die set from Sizzix by Tim Holtz and die-cut that three times in black cardstock to layer for dimension.

To finish, I attached everything to a top-folding A2 card base.

Thanks for reading. Catch ya next time!

Sasha J


Products Used

  • Ciao Bella Paper Star Six Stencil
  • Sizzix + Tim Holtz Celebration Words: Script Thinlits Dies
  • Ranger Princess Gold Embossing Powder
  • Sizzix Clear Embossing Ink Pad
  • Heat Tool
Screen Shot 2023-04-26 at 11.54.07 AM

Embossing with a Stencil?!

Hi friends! Today’s card is made using a new tool I recently added to my craft collection – the Sizzix silicone rubber and impressions pad, which allows you to emboss stencils! I was really excited to try this tool out. It opens the door to so many new crafting possibilities!

Using the Festive Fall Stencil from Echo Park Paper Co, I embossed white cardstock using the already-mentioned Sizzix embossing tools. I lightly sprayed the cardstock with water to get a prominent embossed image.

I then used the stencil normally, ink blending a variety of distress oxides and inks to create a rainbow of bright colour. I used the following oxides and inks:

– Saltwater Taffy

– Spiced Marmalade

– Mustard Seed

– Mowed Lawn

– Salty Ocean

– Wilted Violet

Now that I have ink blended and embossed using the same stencil, I trimmed both panels in a way where the ink-blended panel would align with the embossed panel when placed together – it is kind of like a puzzle! After trimming them, I arranged and attached the pieces to an A2 card base.

For the sentiment, I chose the “celebrate” sentiment from the Hello Bluebird Birthday Script Stamp set and fussy cut it using Fiskars 6” spring-assisted scissors. I then attached the sentiment to the card.

I love how this card turned out! You can never go wrong with a simple card!

Thanks for reading! Catch ya next time!

Sasha J


Products Used

  • Echo Park Paper Co Festive Fall Stencil
  • Hello Bluebird Birthday Script Stamp Set
  • Sizzix Embossing Tools – Silicone Rubber and Impressions Pad
  • Sizzix Big Shot
  • Spray Bottle with Water
  • Lawn Fawn Jet Black premium ink pad
  • Spiced Marmalade Distress Oxide
  • Mustard Seed Distress Oxide
  • Mowed Lawn Distress Oxide
  • Salty Ocean Distress Oxide
  • Wilted Violet Distress Ink
  • Blending Brushes
  • Basic White Cardstock
  • Stamp Press
  • Fiskars Portable Paper Trimmer, 12”
  • Bearly Art Glue
  • Double Sided E-Z Runner Grand Adhesive Tape Dispenser
  • Fiskars Titanium Micro-Tip Easy Action Scissors, 6”
Screen Shot 2023-04-25 at 11.55.56 AM

Spring Bird – Sizzix

Hi friends! Today’s card was made using some Sizzix products, with some inspiration from nature!

I recently added the “Spring Bird” Sizzix Thinlits die cut designed by Jenna Rushforth to my craft collection and wanted to make a card with it because, well… it’s spring! It just so happens that earlier in the day, I saw a pair of American Goldfinches, so when I sat down to figure out the colours for my card, I knew I wanted to try and recreate this bird using this die cut!

To pair with the bright yellow of the American Goldfinch, I chose to do the flowers in blue and red. I also decided to die-cut the leaves in two shades of green that complemented the other colours nicely.

Once I had die-cut all my pieces, assembled them, and attached them to the card, I stamped a sentiment from the “Good Vibes #3” Stamp set from Sizzix designed by Pete Hughes. This sentiment was perfect for this card.

To finish, I used foam tape to attach the card front to an A2 card base.

Thanks for reading. Catch ya next time!

Sasha J


Products Used

  • Sizzix Thinlits Spring Bird designed by Jenna Rushforth
  • Sizzix Good Vibes #3 Stamp Set designed by Pete Hughes
  • Sizzix Big Shot
  • Bearly Art Glue
  • Basic White Cardstock
  • Neenah Astrobright Cardstock
  • Recollections Cardstock
  • Finesse by Spectrum Noir Noir Black Ink
  • Stamp Press
  • Joy! Crafts Foam Tape
  • Fiskars Titanium Easy Action Bent Scissors, 10”