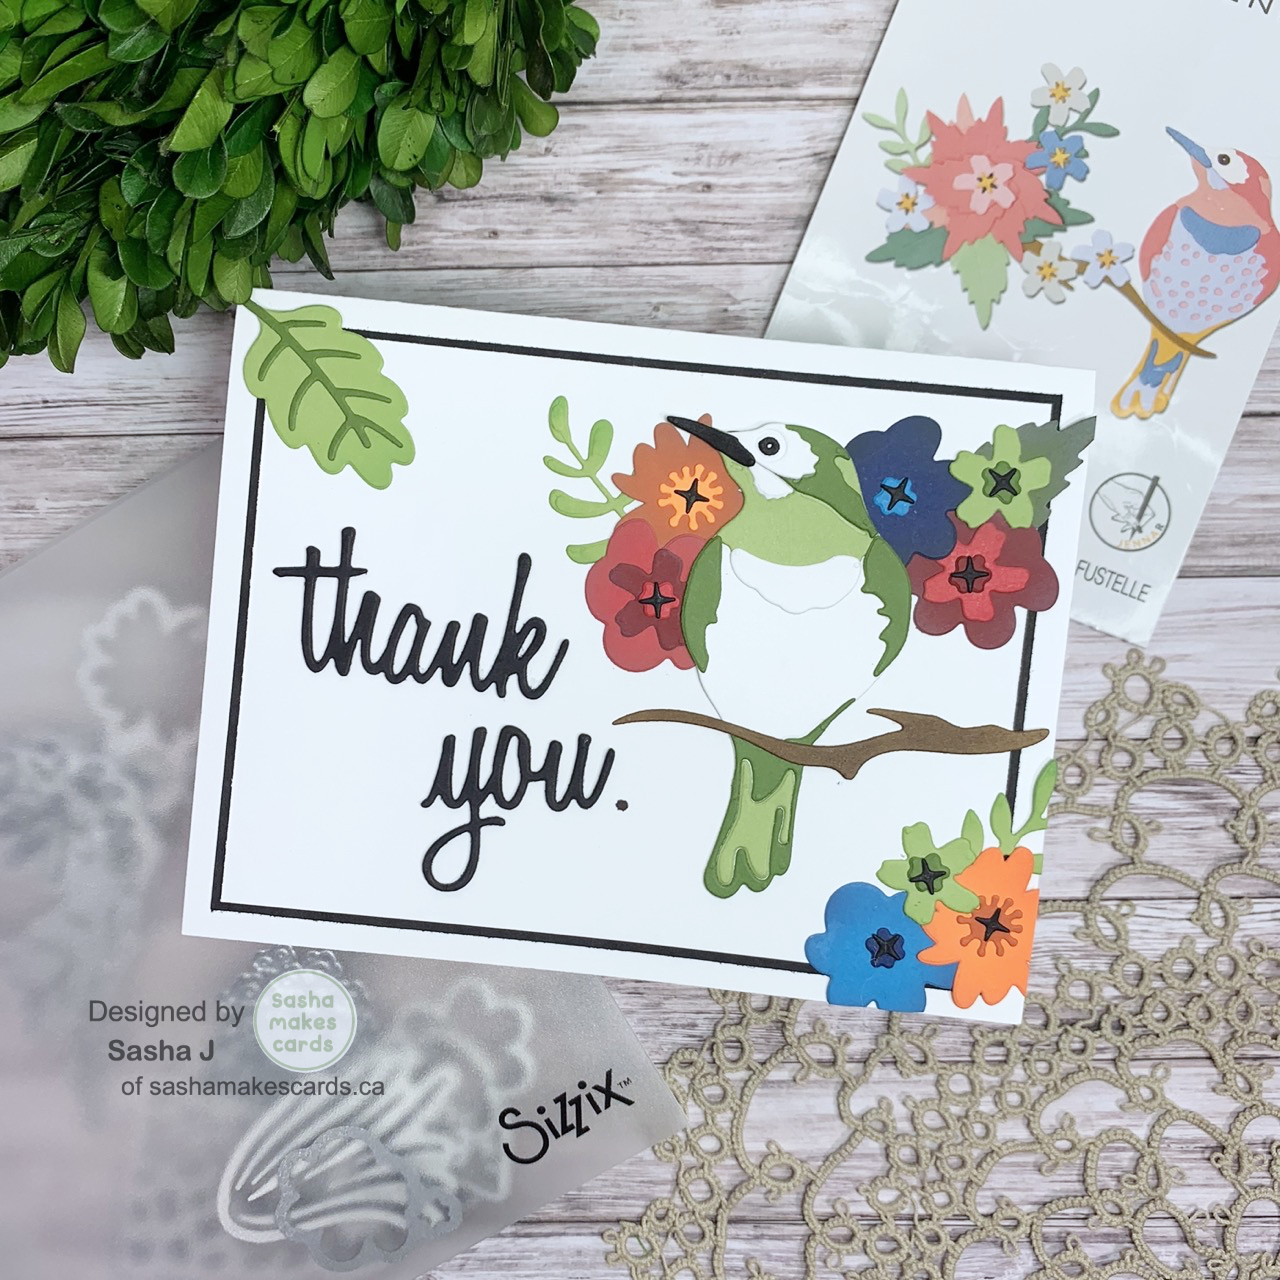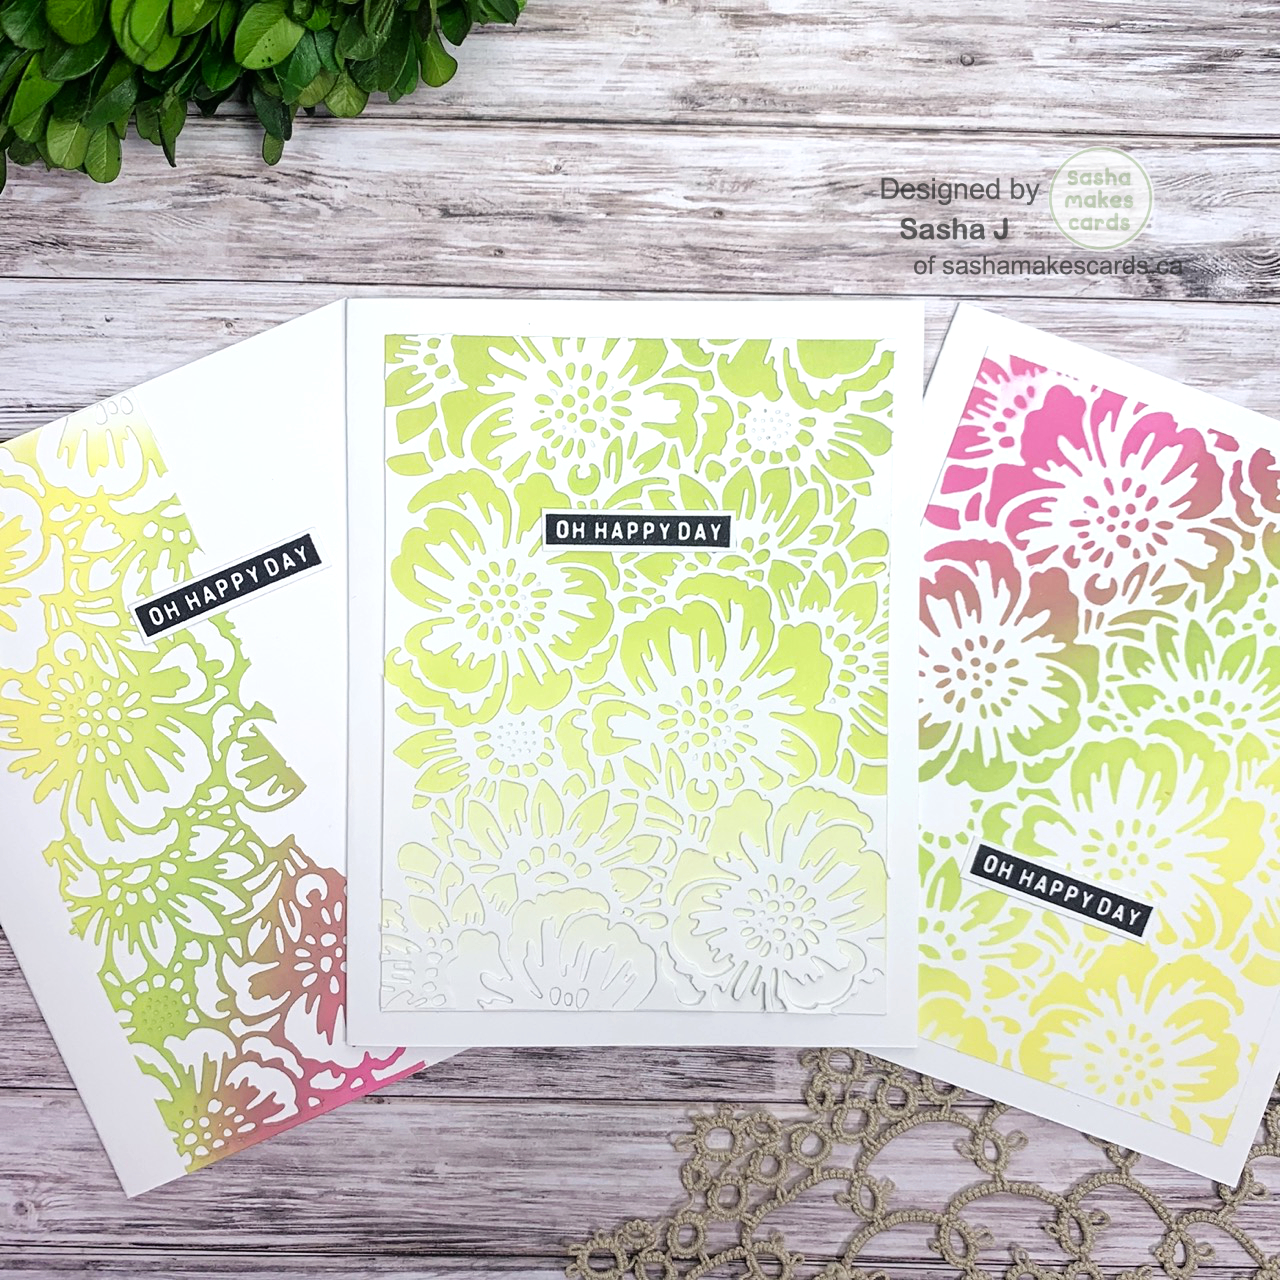
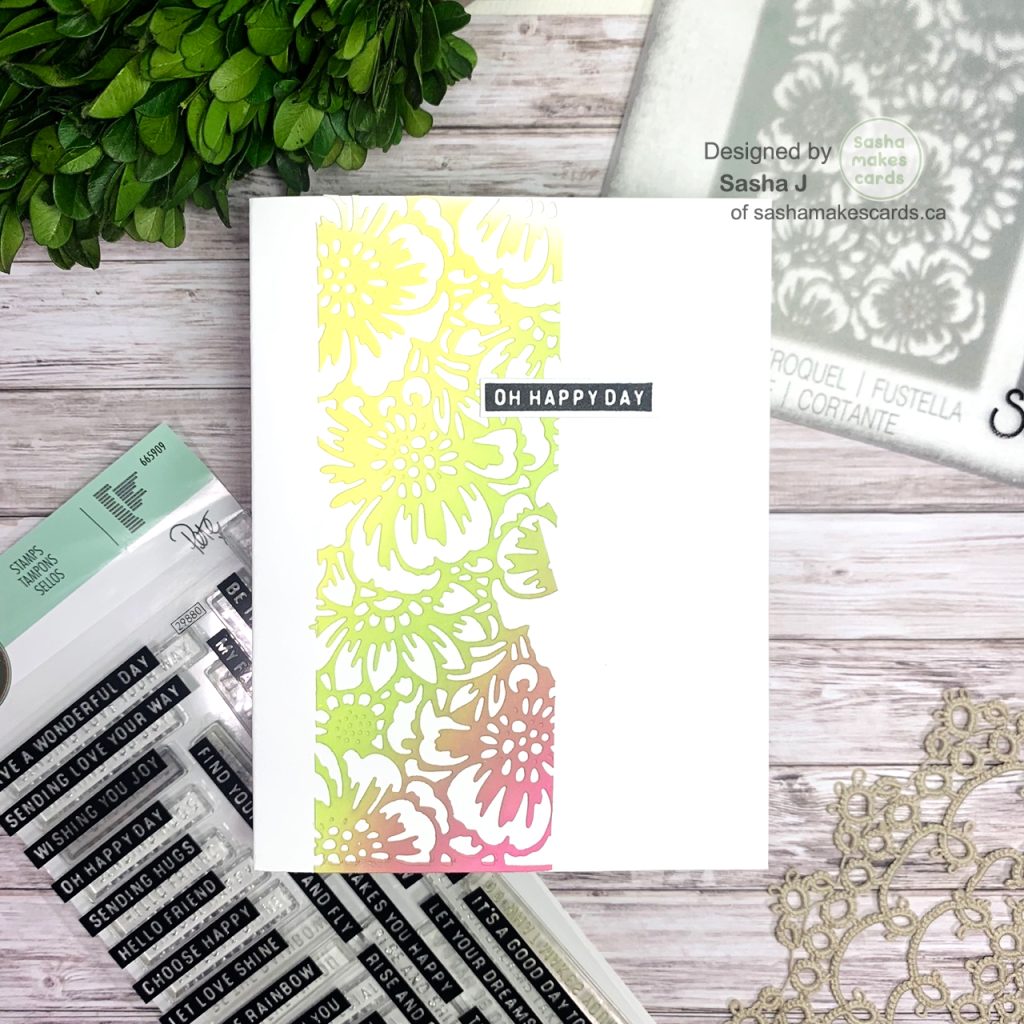
Hi friends! Today I am participating in a hop over on Instagram called Create it Three Ways, a monthly hop where we choose a category (I chose a same stamp and die) and create three different cards! The theme for this month is “summer” and I had a lot of fun creating this set of three summer floral cards in tropical colours!
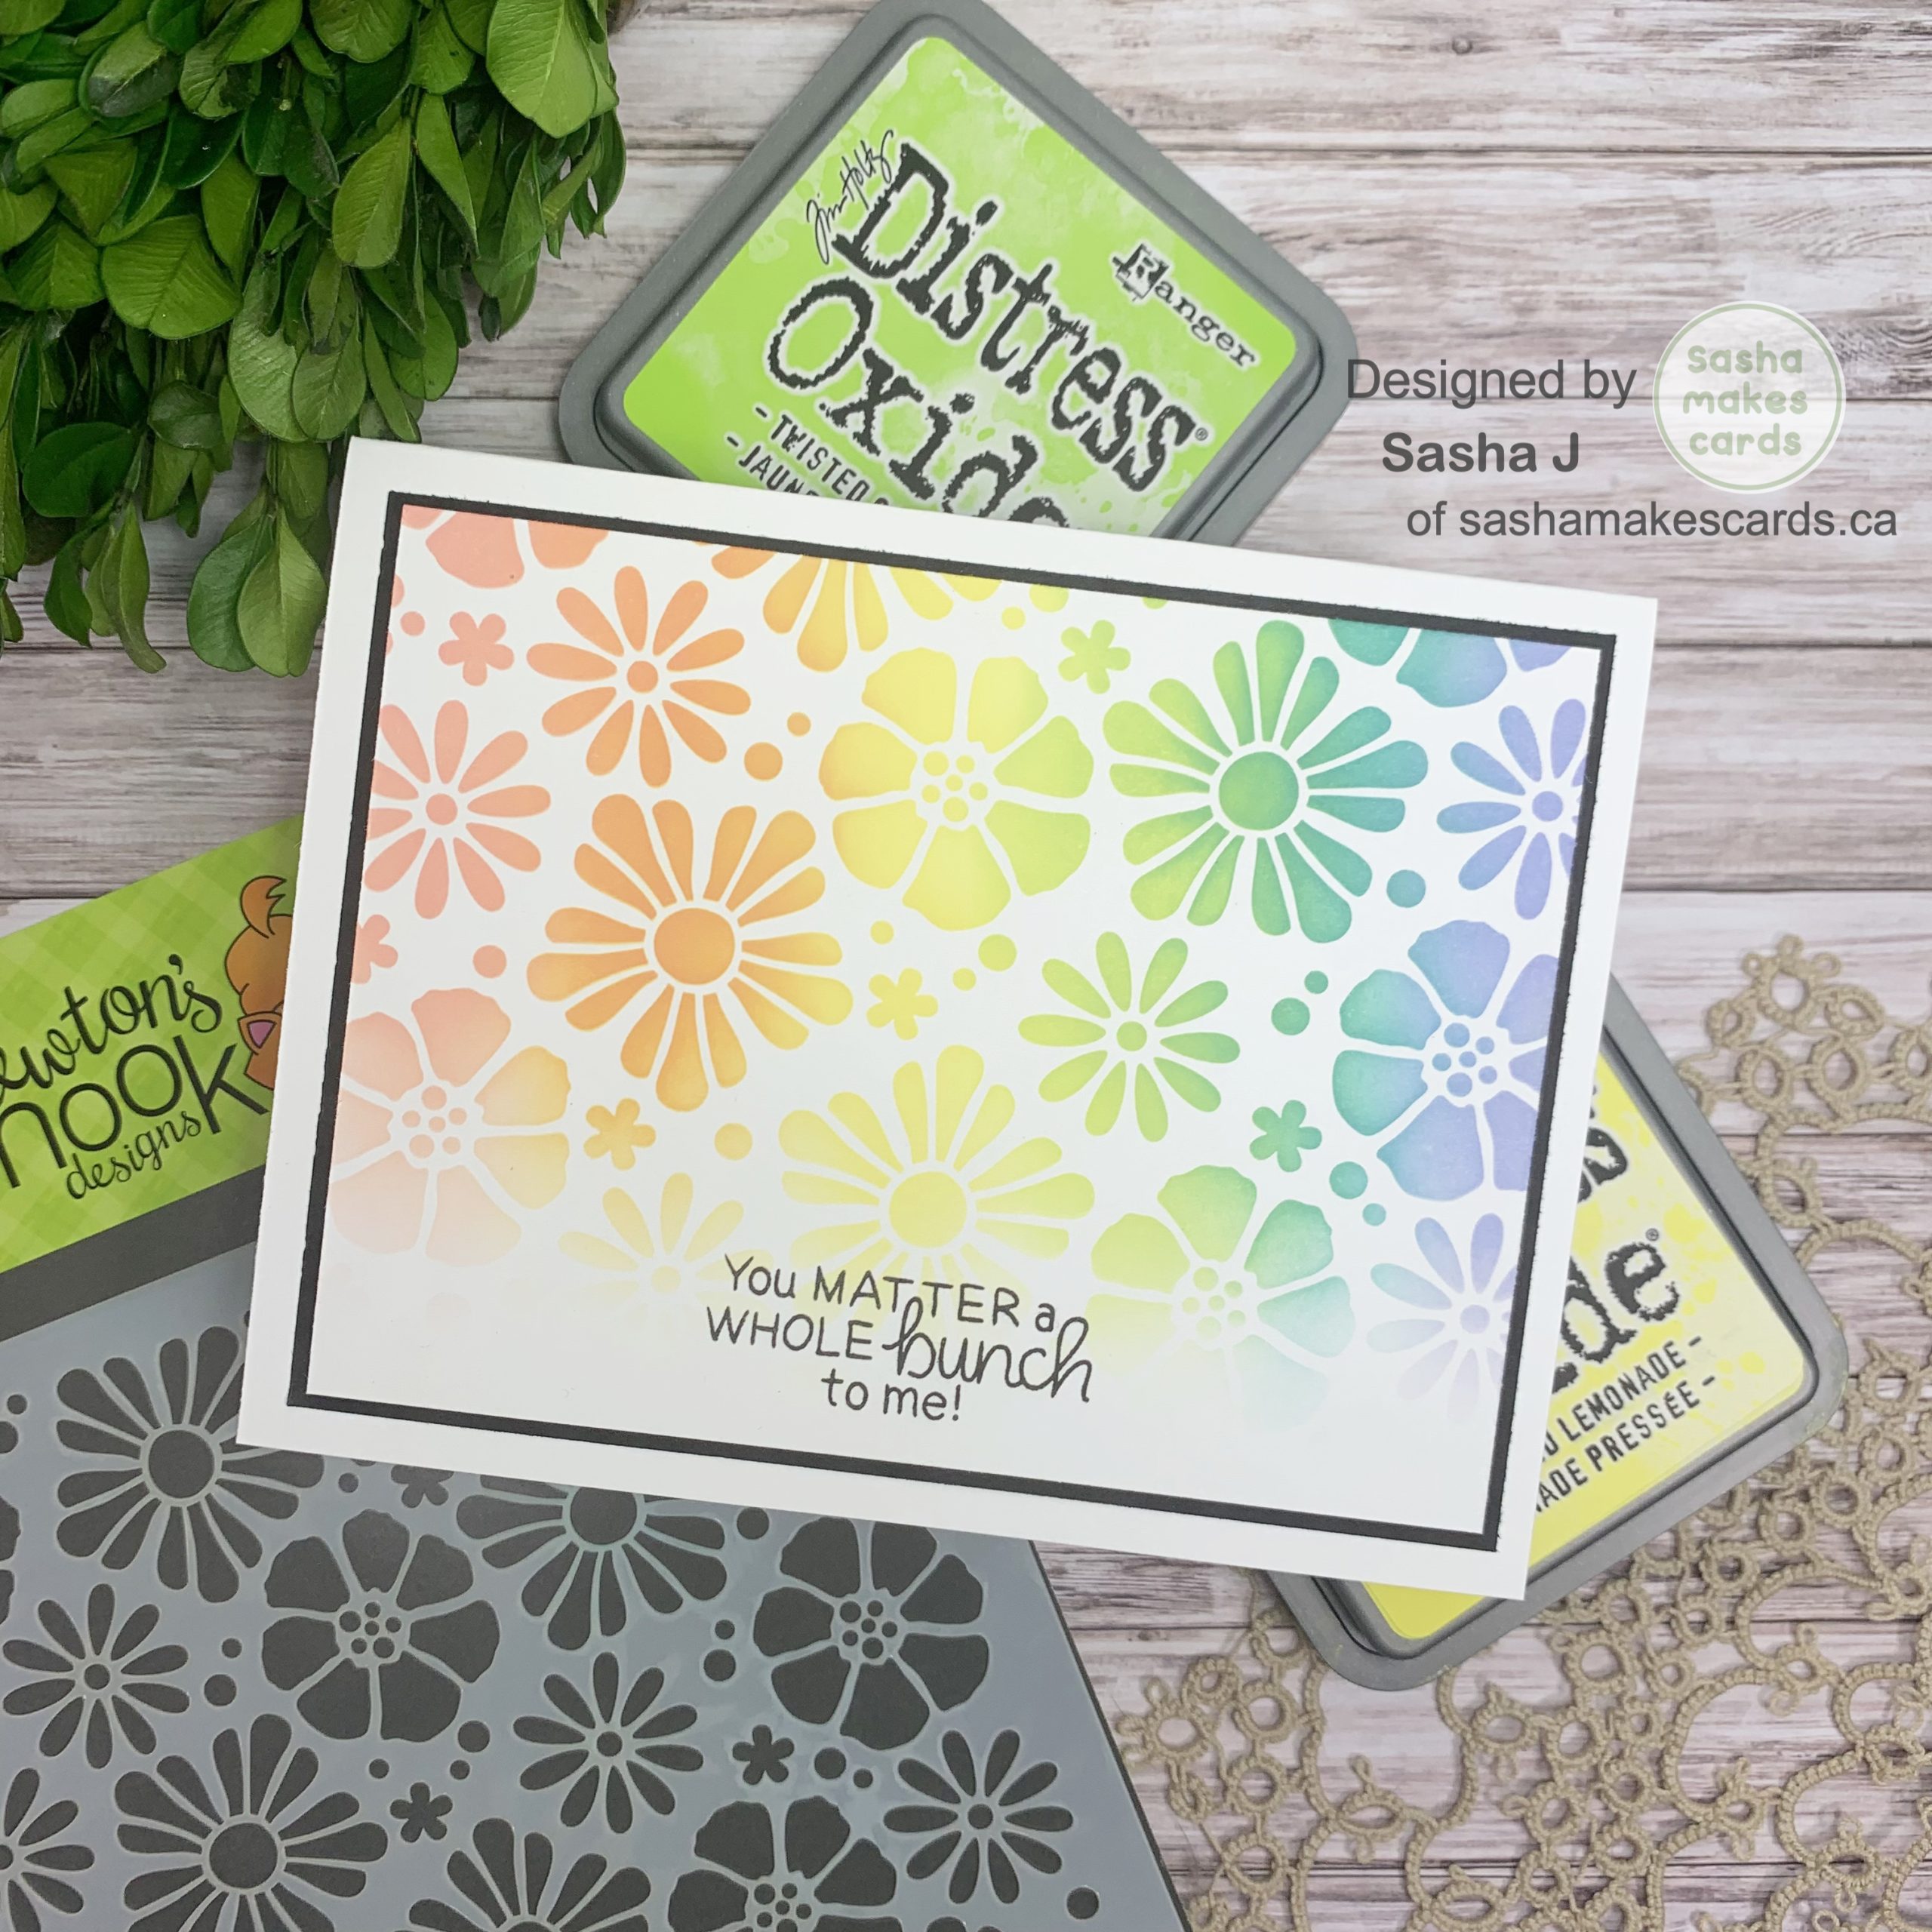
I created all three cards using the Sizzix Bouquet Thinlits Die by Tim Holtz and a sentiment from the Sizzix Good Vibes #3 Stamp set by Pete Hughes and three tropical distress oxides: Twisted Citron, Pickled Raspberry, and Squeezed Lemonade.

For my first card, I placed the die-cut panel on another panel that I had ink blended a gradient of Twisted Citron going dark to light.

For this card, I used the die-cut panel as a stencil, blending a gradient of the three distress oxides onto a card front.
For my last card, I trimmed down the panel I used as a stencil and adhered it to my card base.
I don’y usually make many cards featuring the same products all at once so I had a lot of creating this set of three summer cards!
Be sure to check out the hop on Instagram so that you can hop along and see all the other amazing cards from some amazing crafters!
Thanks for reading. Catch ya next time!
Sasha J
Products Used
- Sizzix Bouquet Thinlits Die by Tim Holtz
- Sizzix Good Vibes #3 Stamp set by Pete Hughes
- Twisted Citron Distress Oxide
- Pickled Raspberry Distress Oxide
- Squeezed Lemonade Distress Oxide