IMG_4797 Large

Two Embossing Powder Techniques in One! – Ciao Bella Paper & Sizzix

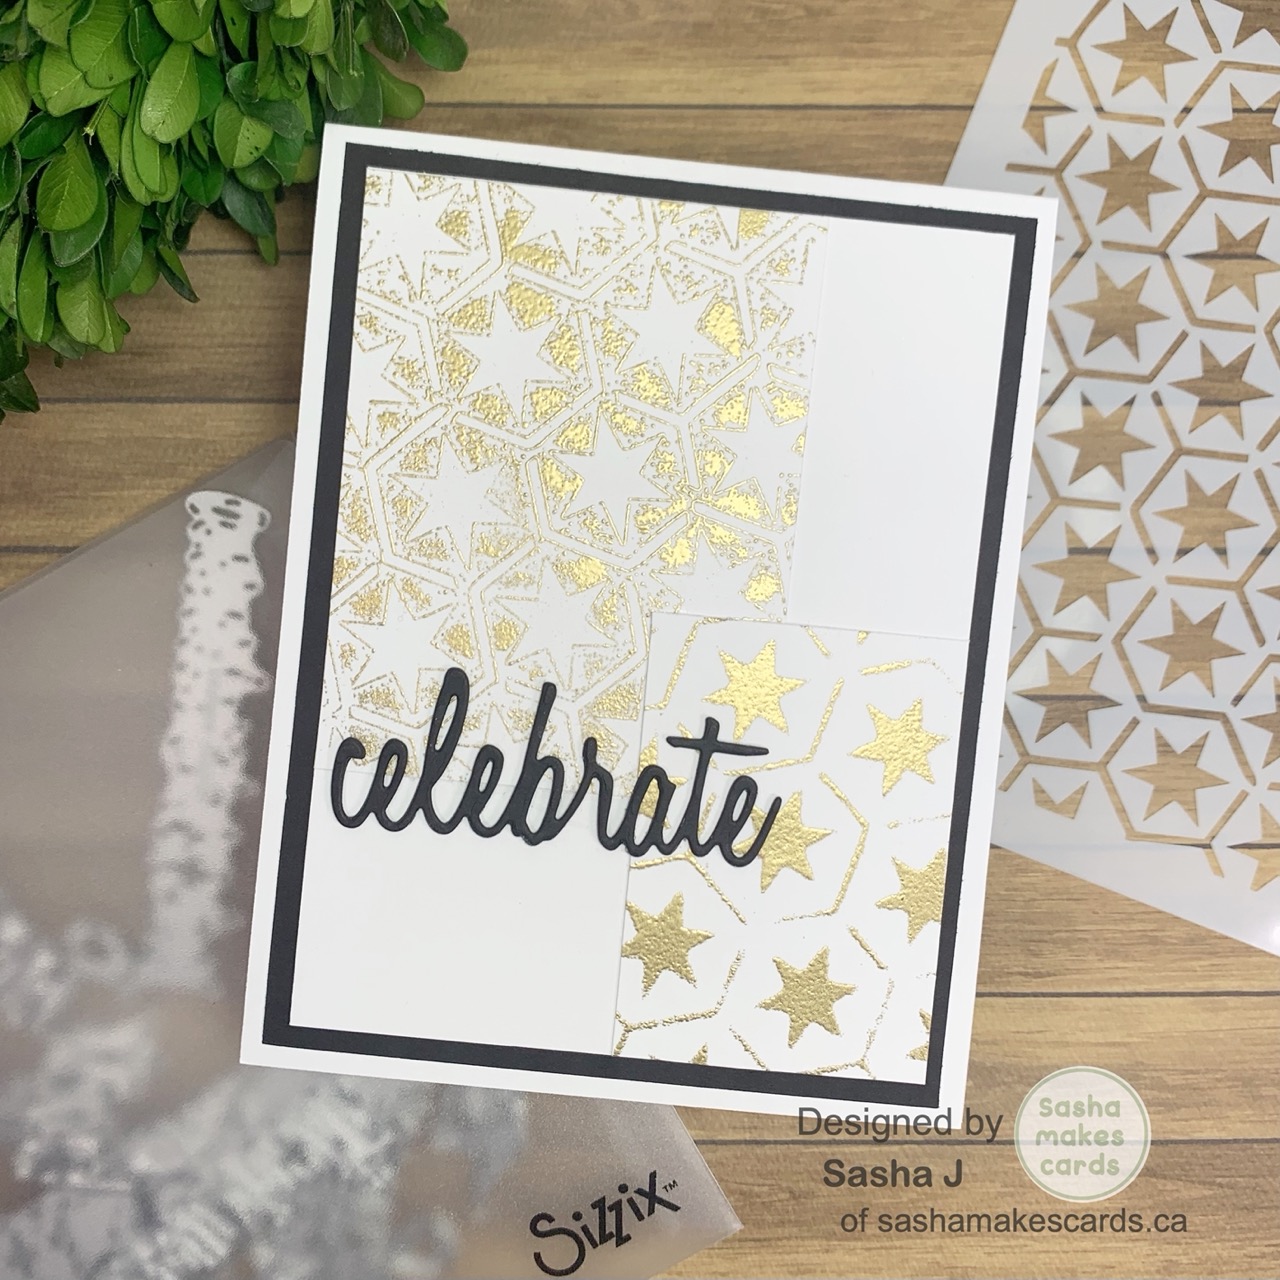
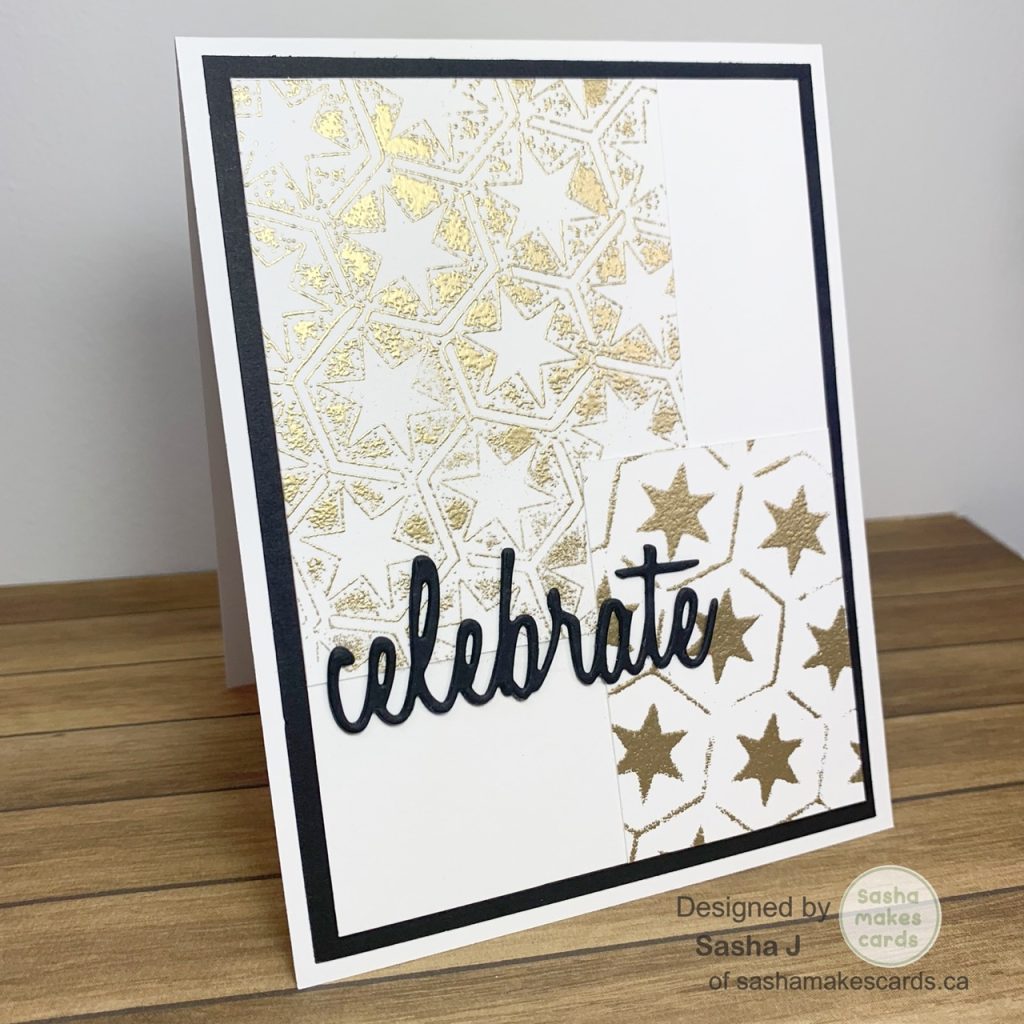
Hi friends! While doing some experimenting with some techniques using embossing powder the other day, I created two samples on small pieces of cardstock (as I had no intention of making a card using these pieces). However, I really liked how they turned out so I decided to make a card out of it! You just got to love a completely improvised card!

Using the Star Six stencil from Ciao Bella Paper, I first applied clear embossing ink right onto the stencil and stamping it onto a scrap of white cardstock. For the other way, I layed my stencil on a piece of scrap white cardstock and applied the embossing ink to the cardstock normally. For both samples, I used Princess Gold Embossing powder.

I chose a sentiment from Celebration Words: Script die set from Sizzix by Tim Holtz and die-cut that three times in black cardstock to layer for dimension.

To finish, I attached everything to a top-folding A2 card base.

Thanks for reading. Catch ya next time!

Sasha J


Products Used

  • Ciao Bella Paper Star Six Stencil
  • Sizzix + Tim Holtz Celebration Words: Script Thinlits Dies
  • Ranger Princess Gold Embossing Powder
  • Sizzix Clear Embossing Ink Pad
  • Heat Tool
IMG_4794 Large

Alcohol Inks for MerMay! – Sweet November Stamps

Hi friends! Although May is more than halfway through (where does the time go?!), I decided to make a mermaid card for MerMay using Sweet November Stamps!

Using the Merbabies: Splash and Wiggles digital stamp, I used the following Ohuhu alcohol markers to colour them:

Mermaid: R29, R19, R18, Y11, E210, E280, PB6, PB8, PB7, B070, B050, B030

Octopus: Y10, YR3, Y4

As for the background, I decided to use some alcohol inks to do some ink smooshing! It was actually my first-time ink smooshing, so I had some fun experimenting with it! I also decided to splatter some white acrylic paint to add more interest to the background.

Thanks for reading. Catch ya next time!

Sasha J


Products Used

  • Sweet November Stamps Splash and Wiggles Digital Stamp
  • Ohuhu Alcohol Markers
  • Magicfly Alcohol Inks
  • White Acrylic Paint
  • Royal and Langnickel Fan Brush
  • Beary Art Glue
IMG_4783 Large

Creating a Scene Using Alcohol Markers! – Kraftin’ Kimmie Stamps

Hi friends! For today’s card, I am trying something new… creating a one layered card using masking! I’ve always been a little intimidated by masking but decided to give it a shot and let’s just say it won’t be my last time doing it!

After having stamped my images from the Love Bugs stamp set from Kraftin’ Kimmie Stamps, I used Squeezed Lemon, Mustard Seed and Spiced Marmalade to create a glowing sunset using the Scene Maker stencil and mask from Simon Hurley Create.

Once I had created a sunset, I used the following Ohuhu alcohol markers to create a scene for the bugs:

Lady Bugs: NG06, CG070, CG050, R8, R2, R1

Flower: E310, Y12, E170, Y2, Y1, Y3, GY42, G240

Hills: GY173, GY6, G220, G240, GY42, G7, GG020

Sky: B220, B260, B120, Y030, YR030

After colouring, I stamped a sentiment from the Love Bugs stamp set onto the sun. To complete the card, I used tape runner to attach the finished card to a larger panel of black cardstock and then to an A2 card base.

Thanks for reading. Catch ya next time!

Sasha J


Challenges Entered

Kraftin’ Kimmies Saturday Challenge


Products Used

  • Kraftin’ Kimmie Stamps Love Bugs Stamp Set
  • Ohuhu Alcohol Markers
  • Distress Oxide
  • Blending Brushes
  • Hammermill Premium Colour Copy 100 lb cardstock
  • Astrobright Black Cardstock
  • Fiskars 12” Portable Trimmer
  • Fiskars 6” Spring Assisted Scissors
  • Stamp Press
  • Lawn Fawn Lawn Fawn Jet Black Premium Ink Pad
  • Double Sided E-Z Runner Grand Adhesive Tape Dispenser
Card #1 copy Large

Rainbow Floral Stitched Card – Spellbinders and Simon Says Stamp

Hi friends! Today’s card is my first time ever stitching a card, and I LOVED it – I can’t wait to buy more stitching dies!

If you want to watch me make this card, check out YouTube on making this card below!

Using the Stitched Floral Flip Frame Etched Dies from Spellbinders and cardstock from Neenah Astrobright and Recollections, I die-cut a TON of flowers in a rainbow of colours. Since I was using lighter cardstock for this, I die-cut each stitched flower twice (for a total of four) so that I could glue two of them together to make the cardstock better for the stitching. I also die-cut the simple flower with no stitching four times in each colour – two for the back of the stitched flowers and two to help create the repeating pattern on the finished card.

After stitching all of the flowers and gluing the backings on, I die-cut a large Happy Birthday sentiment three times using the Simon Says Stamp Large Fancy Happy Birthday Die. I glued the sentiments together to give the card some more dimension.

To finish, I attached everything to an A7 card base – the happy birthday sentiment is raised using foam squares.

Thanks for reading. Catch ya next time!

Sasha J


Challenges Entered

Two Scrapbook Friends – Repetitive

Simon Says Stamp IG Challenge – Fun with Flowers

Happy Little Stampers – Anything Goes with Dies


Products Used

  • Spellbinders Stitched Floral Flip Frame Etched Dies
  • Simon Says Stamp Large Fancy Happy Birthday Die
  • Neenah Astrobright Cardstock
  • Recollections Cardstock
  • Embroidery Thread
  • Foam Squares
  • Bearly Art Glue
  • Sizzix Big Shot
  • Sizzix Die Brush and Foam Pad
Craft Roulette #163 Large

A Card with Three Tags?! – My First Craft Roulette Submission! Episode #163

Hi friends! Today’s card is my first ever submission for the Craft Roulette show – this card is for episode #163. This episode was also my first time watching the show and I can’t wait to continue watching and to submit more submissions!

The four parameters for this week’s episode were the following:

– Three tags

– May (I used the word may in my sentiment)

– Rose garden colours (I used green and pink)

– Masking (I used the racoon and the masking of the stencil on the tags)

Let me tell you about how I made this card!

Using the Festive Fall Stencil from Echo Park Paper Co., I combined Twisted Citron and Saltwater Taffy Distress Oxides to create a simple gradient of rose garden colours on the three tags.

I used the Cake Time stamp set from Hello Bluebird to stamp a racoon image and coloured it using the following Ohuhu alcohol markers:

CG5, CG2, CGII00, CGII08, CGII07, RV270, RV260, GY3, GY4, GY7

To finish, I printed out a sentiment in a font I liked and attached everything to an A7 card base!

Thanks for reading. Catch ya next time!

Sasha J


Challenges Entered

Craft Roulette – Episode #163


Products Used

  • Hello Bluebird Cake Time Stamp Set
  • Echo Park Paper Co. Festive Fall Stencil
  • Ohuhu Alcohol Markers
  • Stamp Press
  • Lawn Fawn Lawn Fawn Jet Black Premium Ink Pad
  • Double Sided E-Z Runner Grand Adhesive Tape Dispenser
  • Bearly Art Glue
  • Sizzix Big Shot
  • Distress Oxide
  • Blending Brushes
  • Hammermill Premium Colour Copy 100 lb cardstock
  • Fiskars 12” Portable Trimmer
  • Fiskars 6” Spring Assisted Scissors
mother's day ram Large

Cute Mother’s Day Card! – RAM Stamps

Hi friends, and Happy Mother’s Day! I know that Mother’s Day can be a difficult day for many, so I wish love and peace to everyone today.

Today’s card is a Mother’s Day card I made for my own amazing mother featuring the Canadian Beaver digital stamps from RAM Stamps!

After printing out my digi stamp (along with some extra leaves), I used the following Ohuhu alcohol markers to colour the images:

Beavers: E240, E220, E210, WG050, E310, E170

Wood: E240, E220, E210

Leaves: GY3, GY1, GY4

Once the colouring was finished, I used the following distress oxides along with the cloudy stencil from Lawn Fawn and scene maker stencil from Simon Hurley to create a scene for my beavers:

  • Salty Ocean
  • Twisted Citron
  • Mowed Lawn

I also lightly sprayed the sky to give it a fun effect.

Once I attached all the elements on the card front, I then made the inside of the card using some more leaves along with a matching sentiment. This is my first time doing the inside of a card and I had a lot of fun doing it!

Thanks for reading. Catch ya next time!

Sasha J


Products Used

  • RAM Stamps Canadian Beaver Digital Stamp
  • Lawn Fawn Cloudy Stencil
  • Simon Hurley Scene Builder Mask and Stencil
  • Distress Oxides
  • Blending Brushes
  • Ohuhu Alcohol Markers
  • Spray Bottle with Water
  • Double Sided E-Z Runner Grand Adhesive Tape Dispenser
  • Bearly Art Glue
CAS cool colours Large

CAS ‘Cool’ Birthday Card – Echo Park Paper Co. & Simon Says Stamp

Hi friends! Today’s card is a clean and simple birthday card using a cool colour scheme! While I love including many colours and elements on my cards, I always love making clean and simple cards once and a while!

If you want to watch me make this card, check out the YouTube video below! This is my first time uploading a card making video to YouTube so I can’t wait for you all to watch it!

I first started by masking off certain parts of the my stencil using sticky notes – I used the Dreamy Dy Diagonal Stencil by Echo Park Paper Co.. Once the stencil was ready, I used the following distress oxides and inks to create a simple line gradient in the bottom corner of my card front:

  • Villanous Potion
  • Wilted Violet
  • Faded Jeans
  • Salty Ocean
  • Mowed Lawn
  • Twisted Citron

To finish, I stamped two small and simple sentiments from the Simon Says Stamp Best Year Yet stamp and adhered my card front to an A2 card base. The stamp set I used is from Simon Says Stamp May Card Kit – I LOVE this card kit and cannot wait to make birthday cards using the supplies in this kit.

Thanks for reading. Catch ya next time!

Sasha J


Challenges Entered

AAA Cards – Hot or Cold Colour Scheme


Products Used

  • Echo Park Paper Co Dreamy Day Diagonal Stencil
  • Simon Says Stamp Best Year Yet Stamp Set
  • Distress Oxides/Inks
  • Blending Brush
  • Lawn Fawn Lawn Fawn Jet Black Premium Ink Pad
  • Double Sided E-Z Runner Grand Adhesive Tape Dispenser
  • Bearly Art Glue
  • Stamp Press
  • Basic White Cardstock
IMG_4617 Large

Fun Splatter Birthday Card – Isabel Cristina Stamps

Hi friends! Today’s card is another card featuring digi stamps from Isabel Cristina Stamps!

I printed and cut an image from the Hooray digi set and coloured it using the following Ohuhu alcohol markers:

Mouse: CG2, CGII00, RV260, RV270

Confetti: B050, B120, B140

I then used Salty Ocean Distress Oxide, a paintbrush, and a spray bottle with water to splatter the distress oxide onto the card front. To finish, I glued everything down.

Thanks for reading. Catch ya next time!

Sasha J


Products Used

  • Isabel Cristina Stamps Hooray Digi Stamp Set
  • Ohuhu Alcohol Markers
  • Bearly Art Glue
  • Salty Ocean Distress Oxide
  • Spray Bottle with Water
  • Paintbrush
  • Neenah Astrobright Cardstock
  • Basic White Cardstock
Card #2 copy Large 2

Rainbow Starburst! – Pinkfresh Studio

Hi friends! Today’s card is bright and colourful (my favourite!) one using the layered sunburst stencil from Pinkfresh Studio! I only recently added this stencil to my craft stash and have been wanting to make a card with it. Once I saw their “Rainbow” challenge for the month of May, I knew using this stencil would be perfect!

This card was fairly easy to make but required a lot of ink blending with many distress inks and oxides. The following is a list of all the inks and oxides I used to create this card:

  • Candied Apple
  • Pickled Raspberry
  • Saltwater Taffy
  • Carved Pumpkin
  • Spiced Marmalade
  • Fossilized Amber
  • Mustard Seed
  • Squeezed Lemon
  • Lucky Clover
  • Mowed Lawn
  • Twisted Citron
  • Faded Jeans
  • Salty Ocean
  • Broken China
  • Villainous Potion
  • Wilted violet

Phew… that was a lot!

Once I was done with the stencil, I simply added a white circle with a sentiment on top to finish the card!

I had such a fun time creating this card using this stencil. I am definitely going to have to make some more using this stencil in other ways!

Thanks for reading. Catch ya next time!

Sasha J


Challenges Entered

Pinkfresh Studio Monthly Challenge – Rainbow

Word Art Wednesday – Weeks #595-596

Simon Says Stamp Wednesday Challenge – Stencil It

Happy Little Stampers – Stencil Challenge


Products Used

  • Pinkfresh Studio Layered Starburst Stencil
  • Distress Oxides and Inks (listed above)
  • Blending Brushes
  • Hammermill Premium Colour Copy 100 lb cardstock
IMG_4625 Large

Critter Rainbow Grid – Lawn Fawn

Hi friends! Today’s card features some Lawn Fawn Stamp sets in a rainbow grid pattern!

After cutting out the grid, I applied six different oxides/inks to the squares to make up the colours of the rainbow. Then, using some little critters from the Lawn Fawn Wheely Great Day stamp set, I stamped them using Lawn Fawn Jet Black Premium Ink Pad and coloured them using the following Ohuhu alcohol markers to match the colours of the rainbow:

Deer: R2, R1

Fox: Y10, Y4

Bunny: Y6, Y3

Frog: GY2, GY1

Bear: BG68, BG4

Cat: P4, P3

To finish, I stamped a sentiment from the Lawn Fawn Beam Me Up Stamp Set and glued everything into place.

Thanks for reading. Catch ya next time!

Sasha J


Challenges Entered

Two Scrapbook Friends – Use a Grid Pattern

Word Art Wednesday – Anything Goes


Products Used

  • Lawn Fawn Wheely Great Day
  • Lawn Fawn Beam Me Up
  • Spectrum Noir Finesse (Noir Black)
  • Lawn Fawn Lawn Fawn Jet Black Premium Ink Pad
  • Double Sided E-Z Runner Grand Adhesive Tape Dispenser
  • Bearly Art Glue
  • Sizzix Big Shot
  • Stamp Press
  • Ohuhu Alcohol Markers
  • Hammermill Premium Colour Copy 100 lb cardstock
  • Candied Apple Distress Oxide
  • Spiced Marmalade Distress Oxide
  • Squeezed Lemon Distress Oxide
  • Twisted Citron Distress Oxide
  • Broken China Distress Oxide
  • Wilted Violet Distress Ink