RAM G main

Simple Friendship Card – RAM Stamps

Hi friends! Today’s card features another digi stamp, but this time from RAM Stamps! The stamp I used for this card is called “Giraffe & Bird,” I thought it would make for a perfect friendship card, so I decided to do that!

After choosing a sentiment, I printed both the image and sentiment onto basic white cardstock. I rounded the corners of the sentiment with a corner punch (to give it a softer look) and coloured the digi stamp using the following Ohuhu alcohol markers:

Giraffe: Y3, Y030, YR240, Y120, WG050, WG01

Bird: B070, B050, B030, YR240, Y120

Flowers: RV270, RV260

I then used the Spellbinders Hand Drawn Scallops Embossing Folder to emboss the card front. I wanted to keep this card simple, so embossing the background was the perfect way to add interest.

To finish this card, I attached the card front to an A7 card base and used foam squares to pop up both the sentiment and the image.

Thanks for reading. Catch ya next time!

Sasha J


Products Used:

  • RAM Stamps “Giraffe & Bird” Digi Stamp
  • Spellbinders Hand Drawn Scallops Embossing Folder
  • Ohuhu Alcohol Markers
  • Basic White Cardstock
  • Foam Squares
  • Double Sided E-Z Runner Grand Adhesive Tape Dispenser
  • Sizzix Big Shot
bb digi

Rainbows and Digi Stamps – Penguin Palace

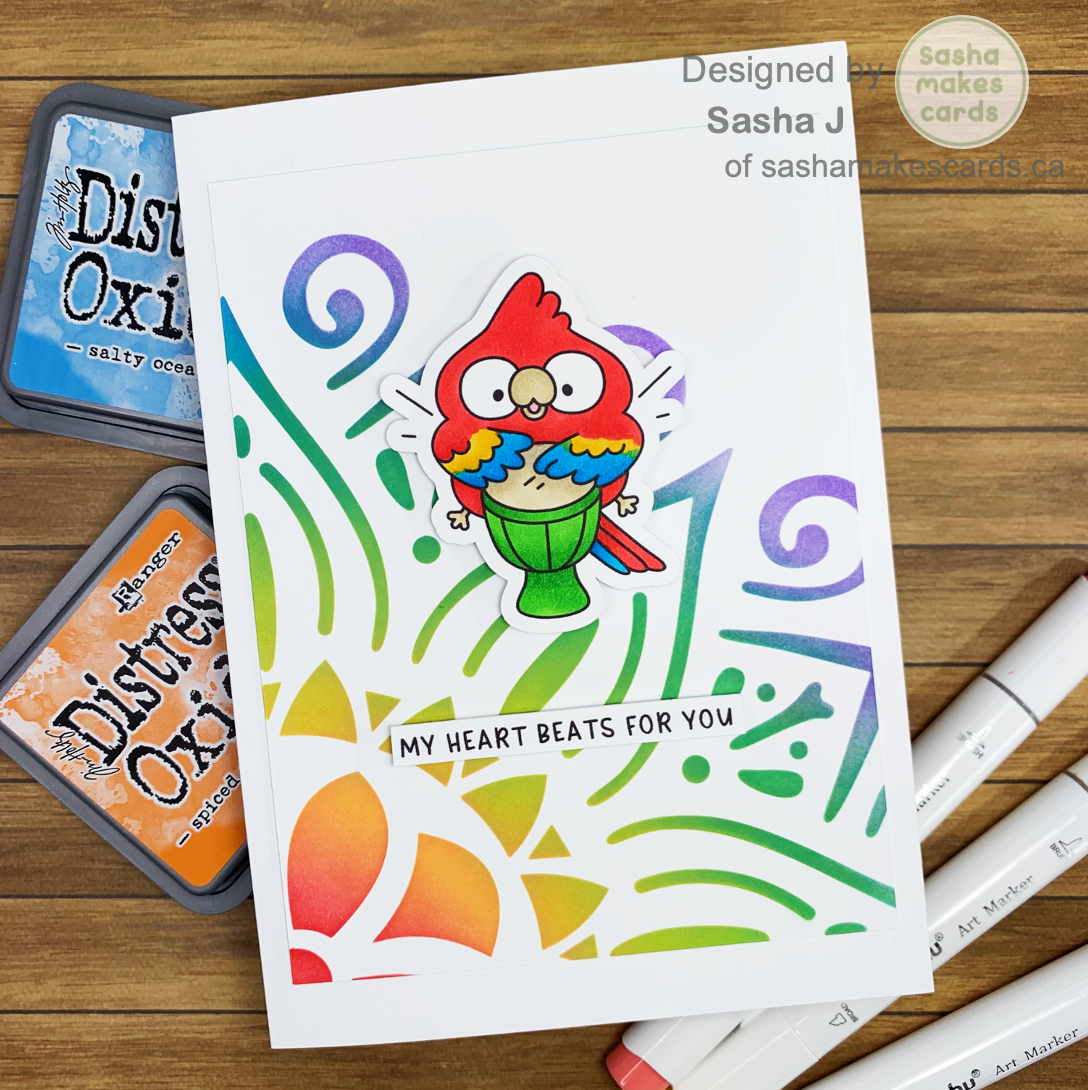
Hi friends! For today’s card, I decided to have some fun with stencils and the “Beautiful Brazil” Digi stamp set from Penguin Palace! This is also my submission for the Penguin Palace Challenge #24 – Stencilling and the Simon Says Stamp Wednesday Challenge “Things with Wings.”

The stencil I used for this card was a generic one, but it was exactly what I was looking for! I used the following distress oxides and inks to create a rainbow of colour:

  • Candied Apple
  • Spiced Marmalade
  • Mustard Seed
  • Mowed Lawn
  • Salty Ocean
  • Wilted Violet

I then printed and cut this parrot and sentiment from the “Beautiful Brazil” Digi stamp – I thought the parrot would match the rainbow colours perfectly! I used the following Ohuhu alcohol markers to colour:
Bird: RV260, RV270, E280, WG050, R1, R2, PB8, B070, Y1, Y2
Drum: E280, WG050, G190, G170

I attached my card front to an A7 card base and then attached the image and sentiment with foam squares to add some dimension – and with that, the card is finished!

While this is a simple card, I like how it turned out! There is nothing wrong with keeping things simple!

Thanks for reading. Catch ya next time!

Sasha J


Products Used:

  • Penguin Palace Beautiful Brazil Digi Stamp Set
  • Stencil
  • Candied Apple Distress Ink
  • Spiced Marmalade Distress Oxide
  • Mustard Seed Distress Oxide
  • Mowed Lawn Distress Oxide
  • Salty Ocean Distress Oxide
  • Wilted Violet Distress Ink
  • Blending Brushes
  • Ohuhu Alcohol Markers
  • Basic White Cardstock
  • Fiskars Portable Paper Trimmer, 12”
  • Double Sided E-Z Runner Grand Adhesive Tape Dispenser
  • Foam Squares
shaped main

Mama Elephant Shaped Card – Up We Go!

Hi friends! Today’s card is for the Simon Says Stamp Wednesday Challenge “Shaped Card!” I have never made a non-squared/rectangular-shaped card, so this was a fun challenge for me. Let me tell you about how I made this card!

After making a circular card base, I stamped some images and a sentiment from the Mama Elephant “Up We Go” stamp and die set. This is an older set but still a really fun one to use, and it was perfect for what I wanted to do!

I coloured the images using the following Ohuhu alcohol markers:

Reds: R1, R2

Oranges: YR170, YR250

Yellows: Y3, Y030, Y050

Greens: GY1, Gy2

Blues: PB7, B070

Purples: V230, V250

I created the background using Salty Ocean and Faded Jeans Distress Oxides and the Lawn Fawn Cloudy Stencil – I wanted the little dog to be floating up into the sky!

I die-cut my coloured images and cropped the corners of my sentiment to better match the shape of the card. I used foam squares to elevate the yellow dog and balloons to add some interest and then attached everything to the card. And with this, the card is finished!

I loved making this circular card. This challenge helped me step outside my comfort zone and make a card I otherwise would not have made. This is one of the many reasons I love participating in challenges!

Thanks for reading. Catch ya next time!

Sasha J


Products Used

  • Mama Elephant Up We Go Stamp and Die Set
  • Stamp Press
  • Ohuhu Alcohol Markers
  • Lawn Fawn Cloudy Stencil
  • Lawn Fawn Jet Black Premium Ink Pad
  • Faded Jeans Distress Oxide
  • Salty Ocean Distress Oxide
  • Blending Brush
  • Basic White Cardstock
  • Sizzix Big Shot
  • Fiskars Titanium Micro-Tip Easy Action Scissors, 6”
  • Fiskars Portable Paper Trimmer, 12”
  • Bearly Art Glue
  • Double Sided E-Z Runner Grand Adhesive Tape Dispenser
  • White Jelly Roll Pen
  • Foam Squares
  • Spectrum Noir Finesse (Noir Black)
  • Round Corner Punch
lala main

Summer Birthday Card – La La Land Crafts

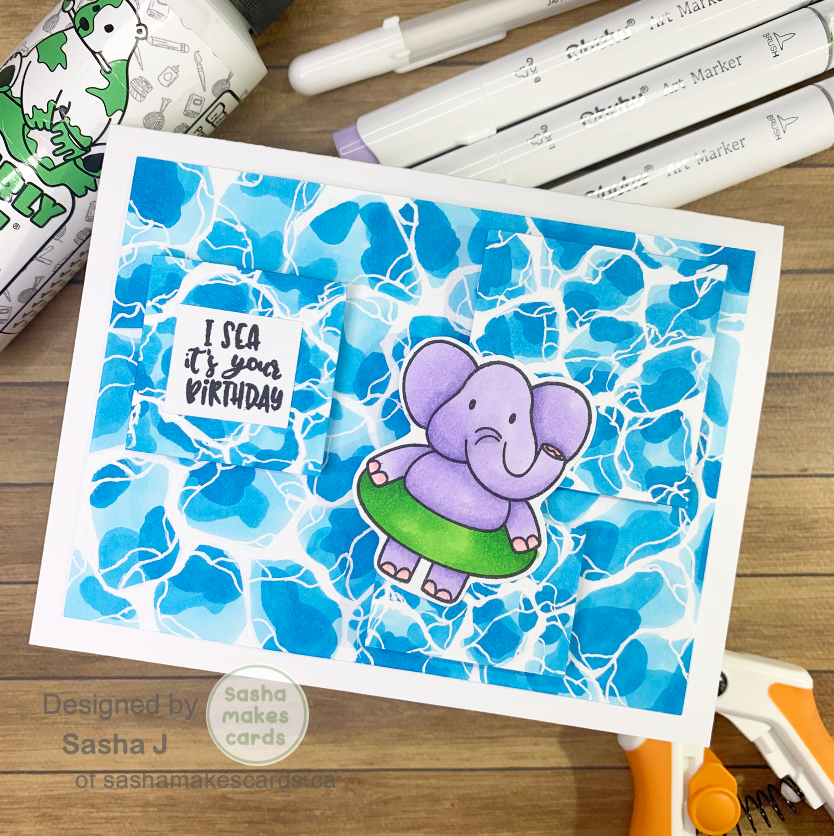
Hi friends! As the weather starts to warm up, I have really started to look forward to summer and all the fun activities that come with the season. So, I decided to make a summer-themed card! This card was made with La-La Land Crafts “Stay Cool” stamp set.

I first stamped this elephant using Lawn Fawn Jet Black premium ink pad and decided on a complementary colour scheme using the following Ohuhu alcohol markers:

Elephant: V230, V250, RV260, RV270

Tube: G170, 190

Using my Fiskars spring-assisted scissors, I then fussy cut my elephant. I tend to avoid using stamp sets without dies in my card designs. However, today – since this is the perfect stamp set for a summer-inspired card – I decided to practice my fussy cutting skills, and I must say that I am rather impressed with myself! You will never improve if you don’t practice.

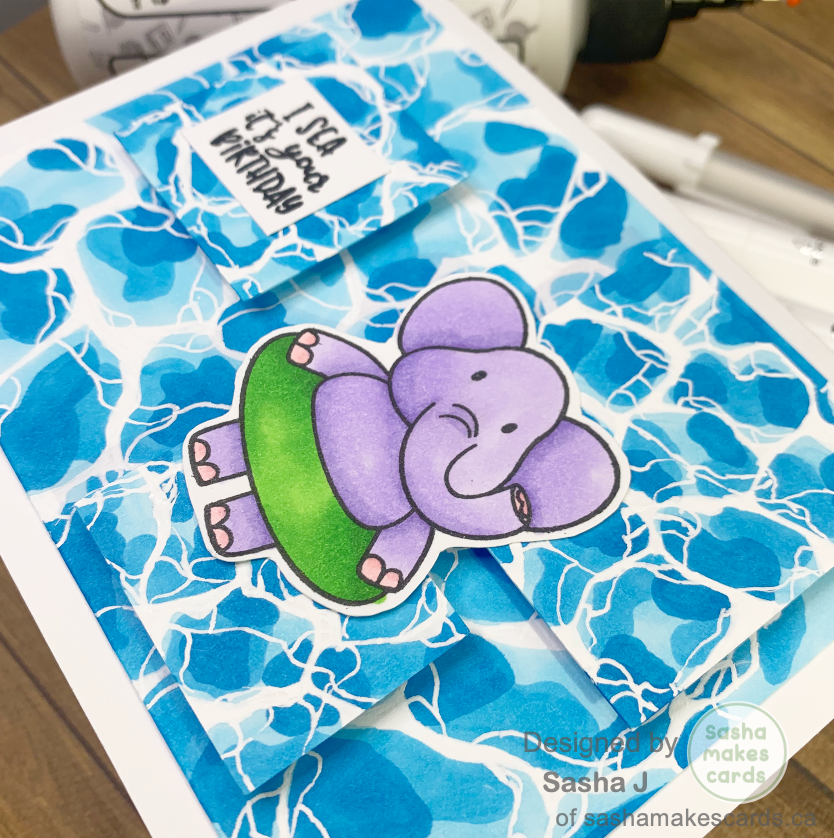
After fussy cutting the elephant, I started on the background. Using three shades of blue Ohuhu alcohol markers (B050, B070, PB8), and a white jelly roll pen, I created a water effect by laying down different abstract shapes on one another. I created this pattern on both the main card front panel and on three smaller shapes to add depth to the water. The white jelly roll was added on top of the shapes to give more of a water effect.

Using foam squares, I adhered the smaller shapes to the main card front and placed the elephant on top. I also stamped a fun sentiment from the stamp set – you can’t go wrong with a good pun!

I love how this card turned out! I am very proud of the water pattern I’ve created using Ohuhu alcohol markers. I also enjoyed being able to practice my fussy cutting to create a super fun, summer-themed card!

Thanks for reading. Catch ya next time!

Sasha J


Products Used:

  • La La Land Crafts Stay Cool Stamp Set
  • Lawn Fawn Jet Black premium ink pad
  • Ohuhu Alcohol Markers
  • White Jelly Roll Pen
  • Basic White Cardstock
  • Fiskars Portable Paper Trimmer, 12”
  • Stamp Press
  • Bearly Art Glue
  • Double Sided E-Z Runner Grand Adhesive Tape Dispenser
  • Foam Squares
  • Spectrum Noir Finesse (Noir Black)
  • Fiskars Titanium Micro-Tip Easy Action Scissors, 6”
Card #4 Large

Colourful Bats! – Lawn Fawnatics Challenge #146

Hi friends! Today’s card is for the Lawn Fawnatics challenge #146, “Colour Inspiration!”

As soon as I saw the colours for this colour inspiration challenge, I immediately knew I wanted to do a sunset/sky-themed card! Knowing this, I looked through my stash of Lawn Fawn products to figure out what sets I wanted to use, and I found the perfect set – the Fangtastic Friends and Fangtastic Friends Add-on stamp sets!

Using the Lawn Fawn cloudy stencil, I used the following inks and oxides to create a sky/sunset background:

– Faded Jeans

–  Salty Ocean

– Mustard Seed

– Pickled Raspberry

– Wilted Violet

Along with a sentiment, I stamped and coloured several bats from the Fangtastic Friends and Fangtastic Friends Add-on stamp sets to match the different colours of the clouds in the background. I used the following Ohuhu alcohol markers to colour the bats:

– Blue bat: B220, B260, B250

– Purple bat: V250, V230, V270

– Pink bat: RV260, RV270, R23

– Yellow bat: Y1, Y3, Y030

After colouring everything, I glued everything to my card to complete the project.

I had a lot of fun creating this card and adore how it turned out! This was a really fun colour combo that I would not have otherwise used!

Thanks for reading. Catch ya next time!

Sasha J


Products Used:

  • Lawn Fawn Fangtastic Friends
  • Lawn Fawn Fangtastic Friends Add-on
  • Lawn Fawn Cloudy Stencil
  • Lawn Fawn Jet Black Premium Ink Pad
  • Faded Jeans Distress Oxide
  • Salty Ocean Distress Oxide
  • Mustard Seed Distress Oxide
  • Pickled Raspberry Distress Oxide
  • Wilted Violet Distress Ink
  • Blending Brushes
  • Ohuhu Markers
  • Stamp Press
  • Basic White Cardstock
  • Sizzix Big Shot
  • Fiskars Portable Paper Trimmer, 12”
  • Bearly Art Glue
  • Double Sided E-Z Runner Grand Adhesive Tape Dispenser
Screen Shot 2023-04-10 at 9.19.05 PM

Shimmer and Shine: Birthday Card with Spellbinders Hot Foil

Hi friends! This card is my entry for the Simon Says Stamp “Shimmer and Shine” Instagram Challenge and their Wednesday Challenge “Happy Birthday” on their blog!

Creating this card included some trial and error as I used hot foiling – something I have never used on a card before and could not quite figure out at first!

Using my Cricut cutting machine, I cut out the yellow triangles and the white rectangle for the sentiment. This helps me make sure everything is a perfect size. I then started the process of trying to understand hot foiling.

After several attempts (only to discover I was placing the hot foil plate on the Spellbinders Glimmer Foil System upside down…), I successfully hot-foiled my sentiment! I used the Spellbinders Happiest Birthday Glimmer Hot Foil Plate and silver Spellbinders foil.

I then die-cut some leaves in various shades of green cardstock from Recollections and Neenah Astrobrights.

After figuring out the layout of the card, I glued everything down. And with this, the card is now done!

Although it took a few attempts to figure out the right way to use hot foil plates, I love how the foil looks – I will have to make more cards featuring hot foil!

Thanks for reading. Catch ya next time!

Sasha J


Products Used:

  • Spellbinders Happiest Birthday Glimmer Hot Foil Plate
  • Spellbinders Silver Glimmer Hot Foil
  • Spellbinders Glimmer Foil System
  • Sizzix Big Shot
  • Leaf die cuts
  • Bearly Art Glue
  • Recollections Cardstock
  • Neenah Astrobright Cardstock
  • Fiskars Titanium Micro-Tip Easy Action Scissors, 6”
  • Double Sided E-Z Runner Grand Adhesive Tape Dispenser
Screen Shot 2023-04-01 at 5.12.32 PM

Winnie the Pooh Card – Lawn Fawnatics Challenge #145

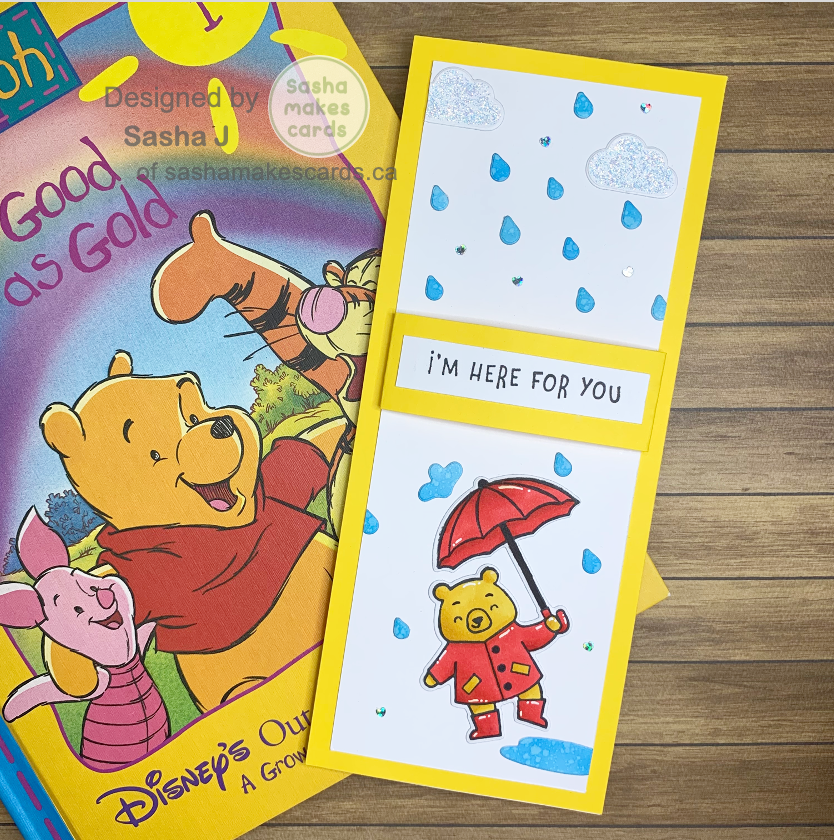
Hi! Today’s card is for the Lawn Fawnatics challenge #145, which is “inspired by book, movie or song.” I have decided to make a Winnie the Pooh-inspired card for my entry! Who doesn’t love Winnie the Pooh?

I started by stamping a bear from the Lawn Fawn Beary Rainy Day stamp set, colouring it with Ohuhu markers, and adding some highlights with a jelly roll pen. I used the following markers: R1, Y5, Y1, Y2, 120.

I then blended salty ocean distress oxide onto a scrap piece of white cardstock, sprayed it with water, and die-cut raindrops and a water puddle. I also die-cut some clouds and added diamond stickles (yay for sparkles!!).

I also stamped a sentiment from the Lawn Fawn Here For You Bear stamp set. I think it goes perfectly with the Winnie the Pooh theme! Since I wanted a 3D element, I adhered the sentiment to a banner that would pop off the card.

After figuring out the layout, I glued everything onto a slimline card base. Finally, I decided to add some more sparkle with heart sequins from Sizzix. You can never have enough sparkle!

And with that, the card is done! I really enjoyed making this card – I am especially happy with how the colouring came out. Practice may not make perfect, but it will make you better!

Thanks for reading, catch ya next time!

Sasha


Products Used:

  • Lawn Fawn Beary Rainy Day Stamp and Die
  • Lawn Fawn Here for you bear Stamp
  • Lawn Fawn Jet Black Ink
  • Astrobright cardstock
  • Basic white cardstock
  • Salty Ocean Distress Oxide
  • Blending Brush
  • Stamp Press
  • Ranger Stickles: Diamond
  • Ohuhu Markers
  • Sakura Jelly Roll Pen
  • Sizzix big shot
  • Bearly Art Glue
  • Fiskars Titanium Micro-Tip Easy Action Scissors, 6”
  • Fiskars Portable Paper Trimmer, 12”
  • Double Sided E-Z Runner Grand Adhesive Tape Dispenser
  • Spray bottle
  • Sizzix festive sequins
for you main

Celebrate Spring with Digi Stamps!

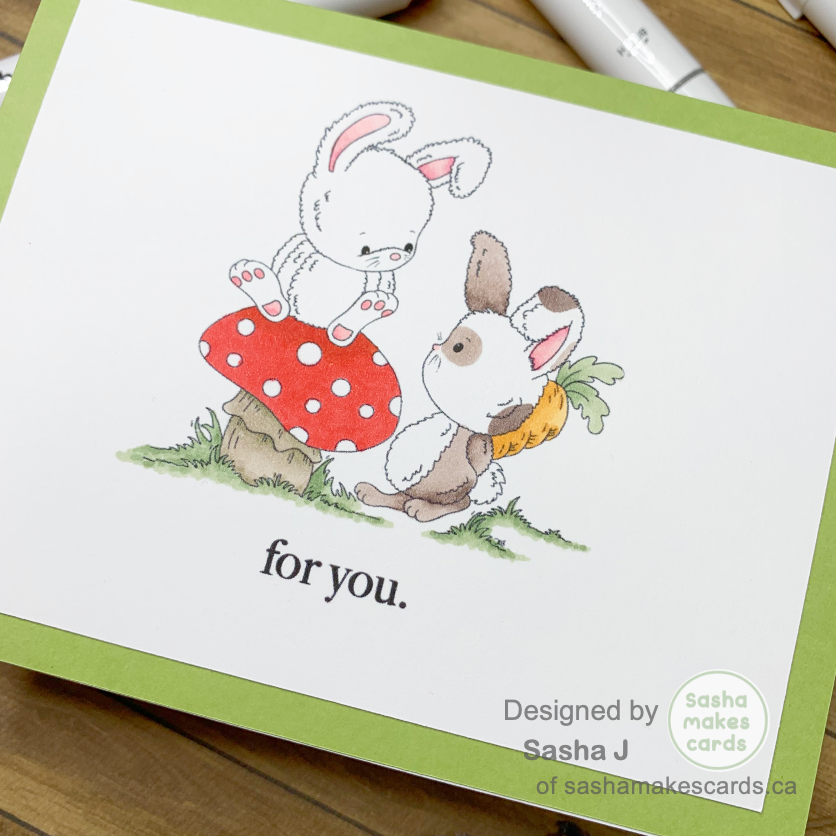
Hi there! I’ve recently discovered the wonderful world of digi stamps, and let’s just say, I can’t get enough of them. I bought a handful from Di’s Digi Stamps, and I love them! I am very excited to use them to make cards!
I made this first card with the Bunnies Special Surprise digi stamp, and I thought it would be the perfect way to start spring and participate in Simon Says Stamp’s Instagram challenge for March as the theme is “Celebrate Spring!”

I sized my digi stamp to be suitable for an A2 card and then added the sentiment by adding text to the image. Making your sentiments in a simple word processing software such as Google Docs or Microsoft word is a great way to expand your collection. Printing and cutting them out are easy, making them a great addition to any card!

After printing out my digi stamp and sentiment, I coloured the digi stamp with the following Ohuhu alcohol markers:

Bunnies: E380, E400, RV260, RV270, R120
Grass and carrot leaves: G220, G240
Carrot: YR240, YR250
Mushroom: R1, R2

After colouring, I adhered my digi stamp and sentiment to the card base. And voila! The card is complete!

Although it’s a pretty simple card, I love how it turned, and I can’t wait to make more cards with the other digi stamps I bought from Di’s Digi Stamps!

Thanks for reading. Catch you next time!

Sasha


Supplies Used:

  • Basic white cardstock
  • Double Sided E-Z Runner Grand Adhesive Tape Dispenser
  • Fiskars Portable Paper Trimmer, 12”
  • Ohuhu alcohol markers
  • Green Recollections cardstock
  • Di’s Digi Stamps “Bunnies Special Surprise”
  • Basic printer
rainbow main

Fun and Simple Crayola Embossing Folder Card

Hi friends! Today I’m sharing this fun and simple card using Crayola markers!

I love colouring with my alcohol markers – and I make many cards using them – but I wanted to try something a little different. I got a pack of 50 Crayola markers from Amazon and thought it would be a nice challenge to figure out a card design using them!

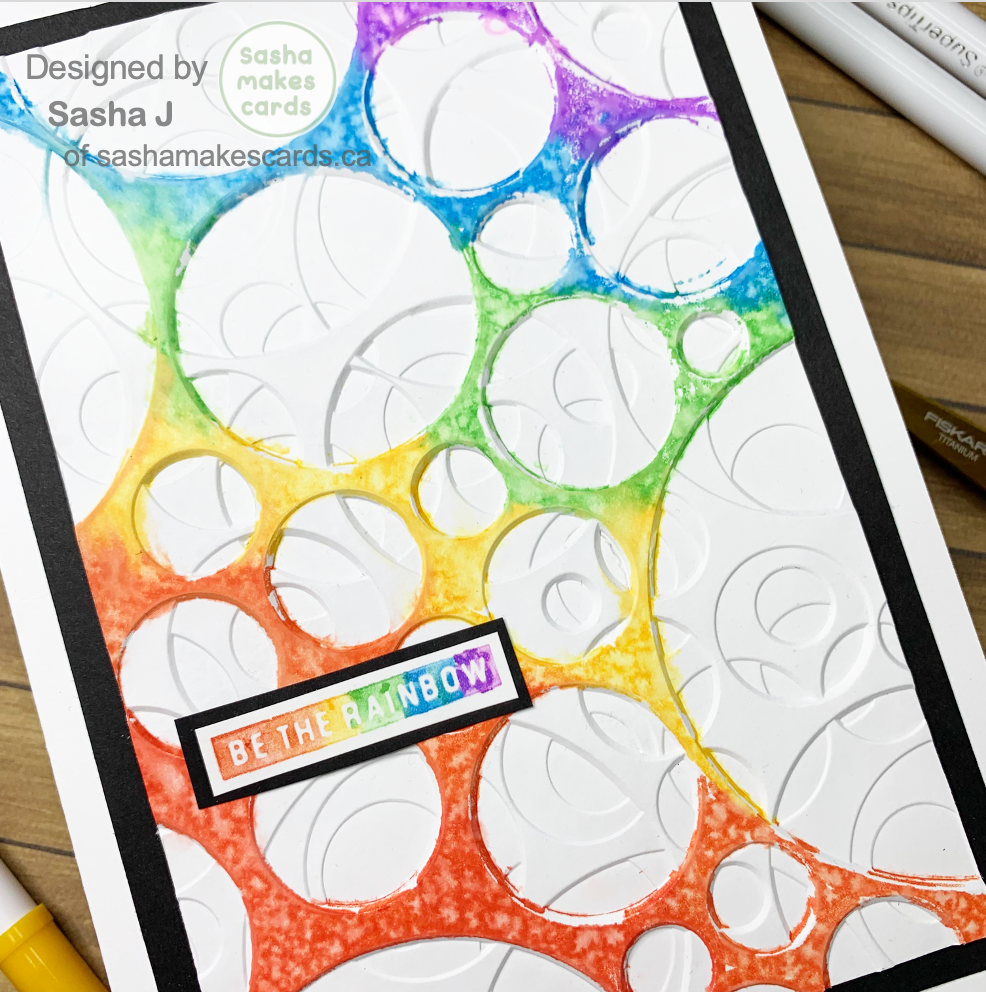
Since Crayola markers are a water-based medium, I wanted to use this to my advantage. After looking through my supplies, I started experimenting with colouring the markers on stamps and embossing folders. After finding the “be the rainbow” sentiment from the Good Vibes #3 stamp set designed by Pete Hughes from Sizzix, I had a better idea of the card I wanted to make.

I then started looking through my embossing folders. After experimenting with several different folders – and how I would use the markers with the folders – I decided on the Swiss Cheese embossing folder also from Sizzix (delicious)!

After colouring the stamp with five different markers to make up the rainbow and stamping it on basic white cardstock, I then coloured the embossing folder.

Using the same five colours, I coloured in the grooves of the folder and then sprayed it with water. I ran it through my Sizzix Big Shot with another piece of white cardstock and LOVED how it turned out.

I then decided to add some black cardstock behind the sentiment and the embossed piece of cardstock to add some contrast and help it stand out.

Finally, I glued everything down onto an A7 card base.

I love the finished card! While with some cards, I have a clear image in mind of how I want to make it and with what supplies, this card came together as I was making it, which was really fun to go with the flow!

Thanks for reading and catch you next time!

Sasha


List of Products Used:

  • Spray bottle with Water
  • Basic White Cardstock
  • Sizzix Swiss Cheese Embossing Folder
  • Sizzix Good Vibes #3 Stamp Set Designed by Pete Hughes
  • Sizzix Big Shot
  • Crayola Super Tip Washable Markers 50 Pack
  • Bearly Art Glue
  • Fiskars Titanium Micro-Tip Easy Action Scissors, 6”
  • Fiskars Titanium Easy Action Bent Scissors, 10”
  • Fiskars Portable Paper Trimmer, 12”
  • Double Sided E-Z Runner Grand Adhesive Tape Dispenser
Screen Shot 2023-03-26 at 12.39.10 PM

Simon Says Stamp February “Winter Blues” Challenge

Hi there, and welcome to the first post of Sasha Makes Cards! The theme of Simon Says Stamp’s monthly Instagram challenge for February is “winter blues,” so I’ve decided to do a fun under-the-water-themed card using some stamp sets from Hello Bluebird!

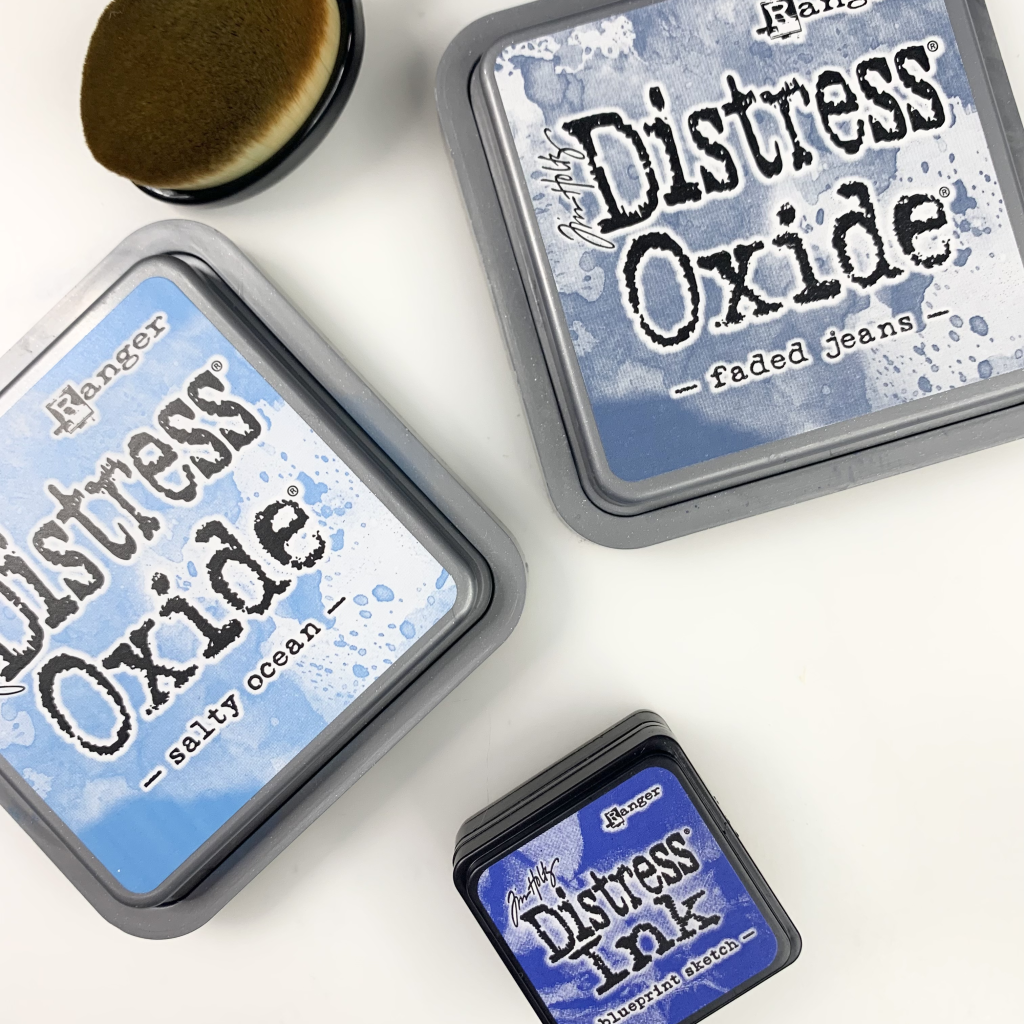
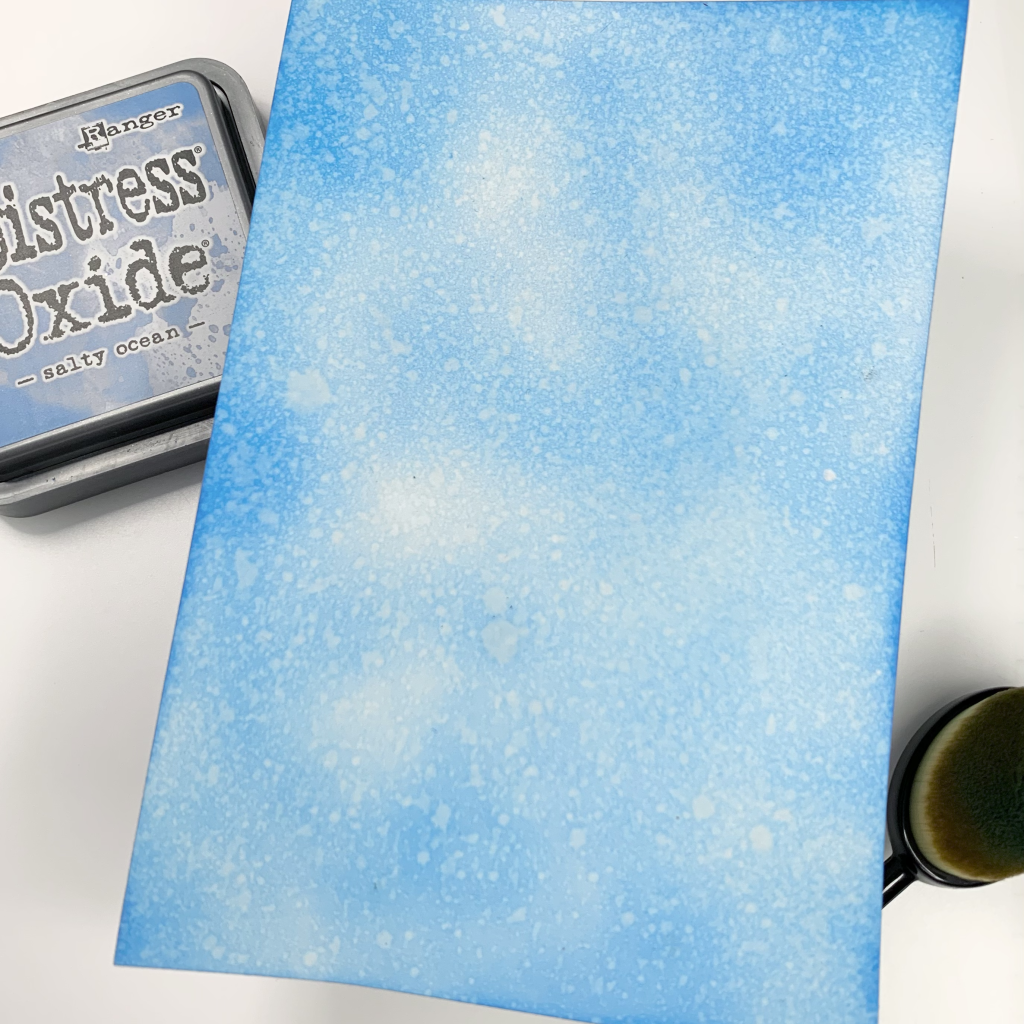
I first cut two pieces of white cardstock to 4.5” x 6.5” using my Fiskars paper trimmer. I also cut and folded the card base. On the one piece of 4.5” x 6.5” cardstock, I used an ink blending brush (I got mine from Amazon) and created a gradient in the two corners of using blueprint sketch distress ink, faded jeans distress oxide, and salty ocean distress oxide. On the other piece of 4.5” x 6.5” cardstock, I used an ink blending brush and simply blended on some salty ocean distress oxide. I then sprayed both pieces of cardstock with some water to create a really fun bubble-like effect.

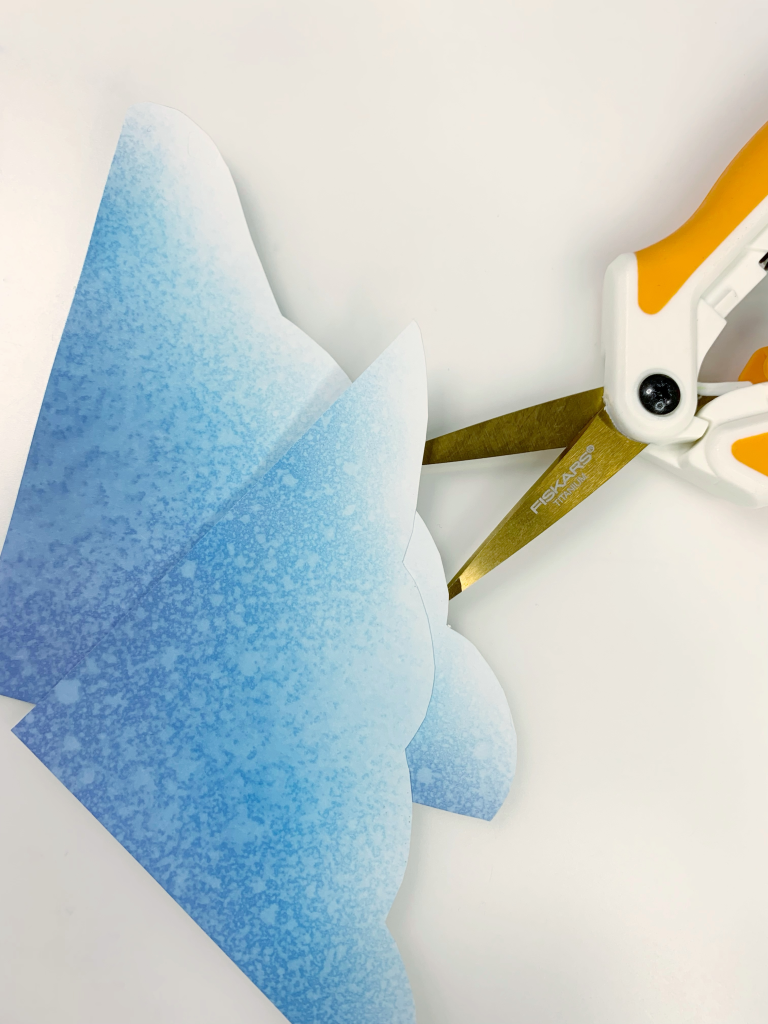
Using Fiskars scissors, I cut one of the pieces of 4.5” x 6.5” cardstock (the one with the gradient in the corners) to create a wavy edge.

Using the Hello Bluebird Sea Life stamp set, I coloured the whale and dolphin using the following Ohuhu alcohol markers:

  • Whale: B050, B030
  • Dolphin: CG050, BG9

Then, using the Hello Bluebird Sea Sentiments stamp set, I stamped a sentiment that I thought would go really nicely with my card. I cut out the sentiment using Fiskars scissors.

I also stamped some little fish on the 4.5” x 6.5” blue background to help add some depth to the finished product.

Now, we can assemble the card! Using foam squares, I placed the two wavy, gradient corners on top of the blue background. The sentiment was glued onto the bottom corner using Bearly Art Glue. I then adhered the dolphin and whale to the card using foam squares. And with that, the card is finished!

Being the first card created for otter blue cards, I think it a rather appropriate first card! I can’t wait to create even more cards to share with all of you!

Thanks for reading!

Sasha J ☺️


List of Products Used:

  • Hello Bluebird Sea Life
  • Hello Bluebird Sea Sentiments
  • Fiskars Titanium Micro-Tip Easy Action Scissors, 6”
  • Fiskars Portable Paper Trimmer, 12-Inch
  • Blending Brush
  • Salty Ocean Distress Oxide
  • Faded Jeans Distress Oxide
  • Blueprint Sketch Distress Ink
  • Lawn Fawn Fundamentals Jet Black Ink
  • Ohuhu Alcohol Markers
  • White Cardstock
  • Foam Squares
  • Bearly Art Glue
  • Double Sided E-Z Runner Grand Adhesive Dispenser